A Round Robin Calendar is a scheduling system that automatically distributes appointments among assigned team members. It ensures fair workload distribution and optimizes availability by automatically checking which team member is available at the requested time. Some key points about Round Robin Calendars:
At least one team member must be assigned to a Round Robin Calendar during setup.
When a customer requests an appointment, the system first checks the availability of the first assigned team member.
If the first team member is not available, it automatically moves to the next team member.
This continues until an available team member is found.
If no team members are available at the selected time, the system prevents customers from booking an empty slot, ensuring they only see valid appointment options.
Key Benefit: Customers only book appointments when a team member is available, eliminating scheduling conflicts and reducing manual intervention.
Creating a Round Robin Calendar ensures that appointments are automatically distributed among available team members. This step involves selecting the calendar type, configuring the appointment distribution logic, and assigning at least one team member.
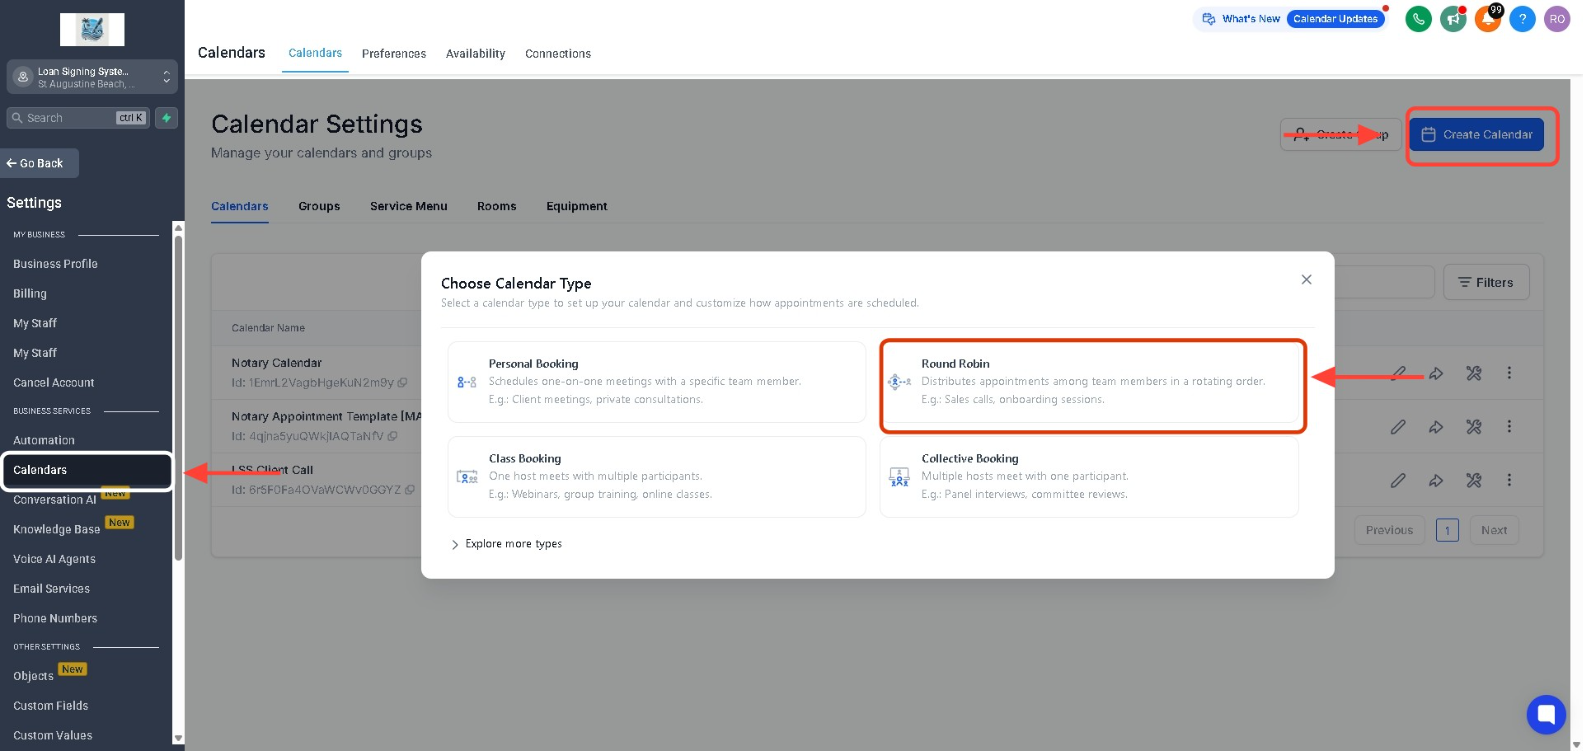
Step 1: Navigate to Settings → Calendars in your left-hand navigation menu, click on Create Calendar, and select the Round Robin as the calendar type.
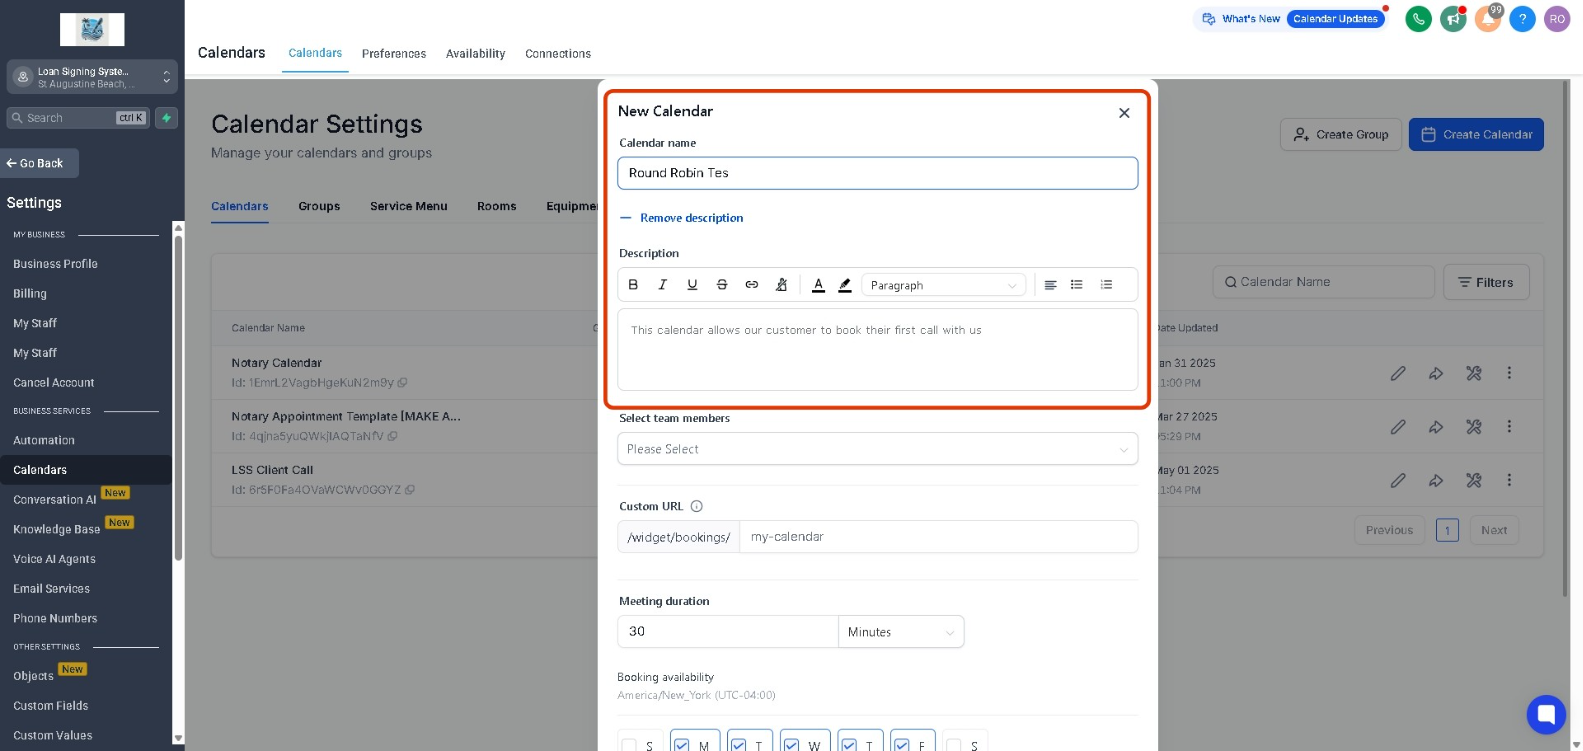
Step 2: Calendar Name and Description: Here, you can assign a name to the calendar and add a description based on your requirements. The description helps clarify the purpose of the calendar, making it easier to remember its intended use or the reason it was created.
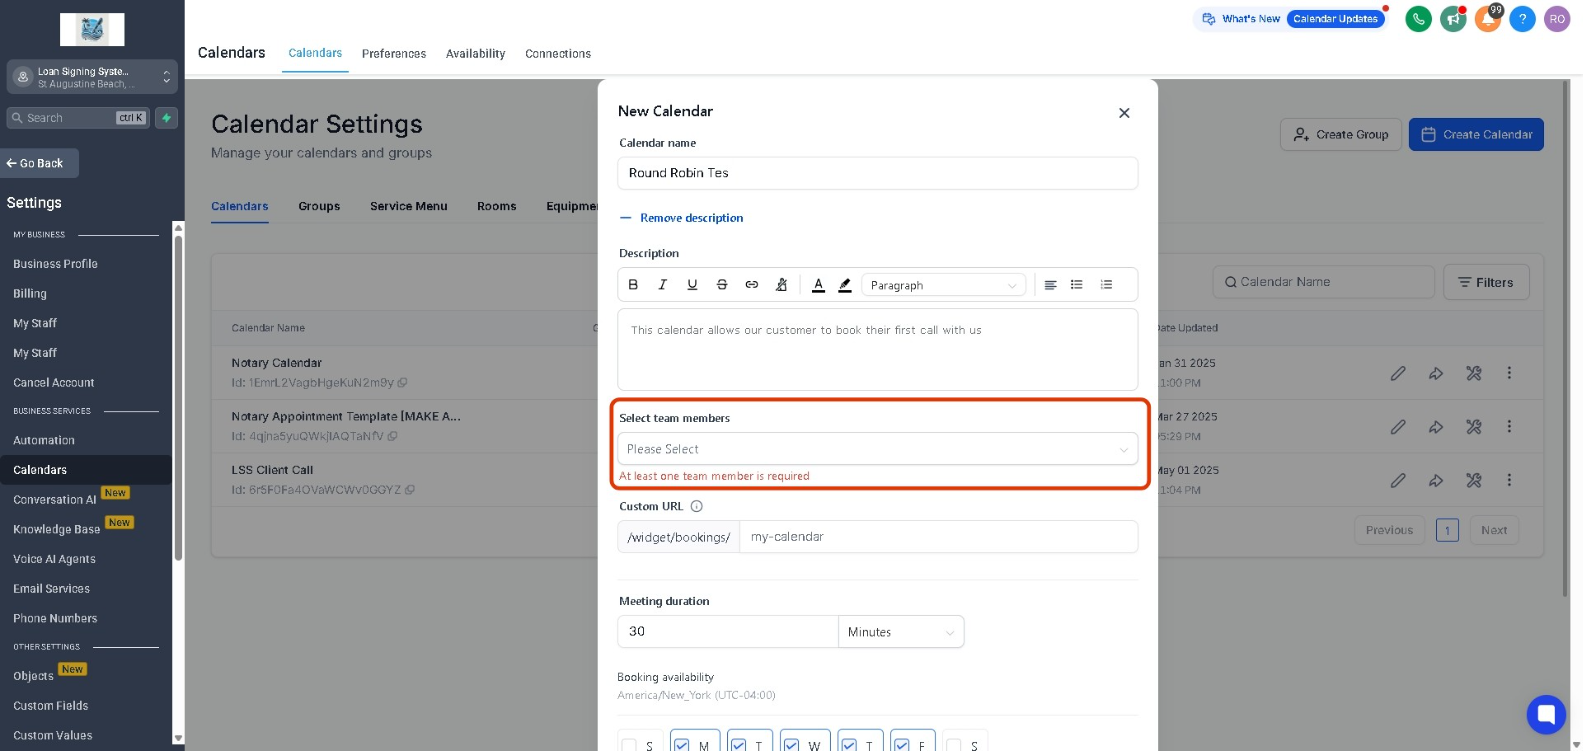
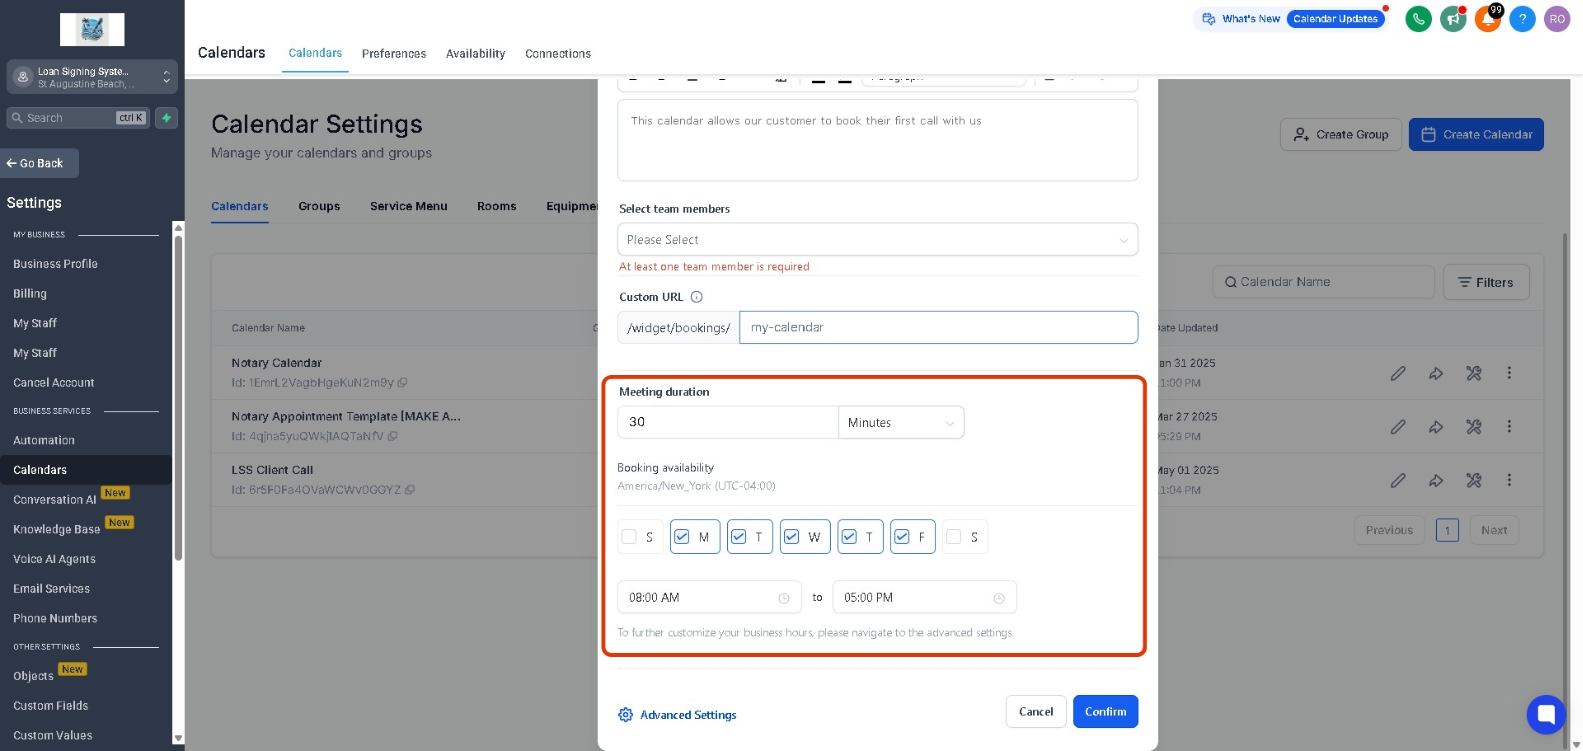
Step 3: Select Team Members: Choose one or more team members who will be assigned appointments through the Round-Robin scheduling system.
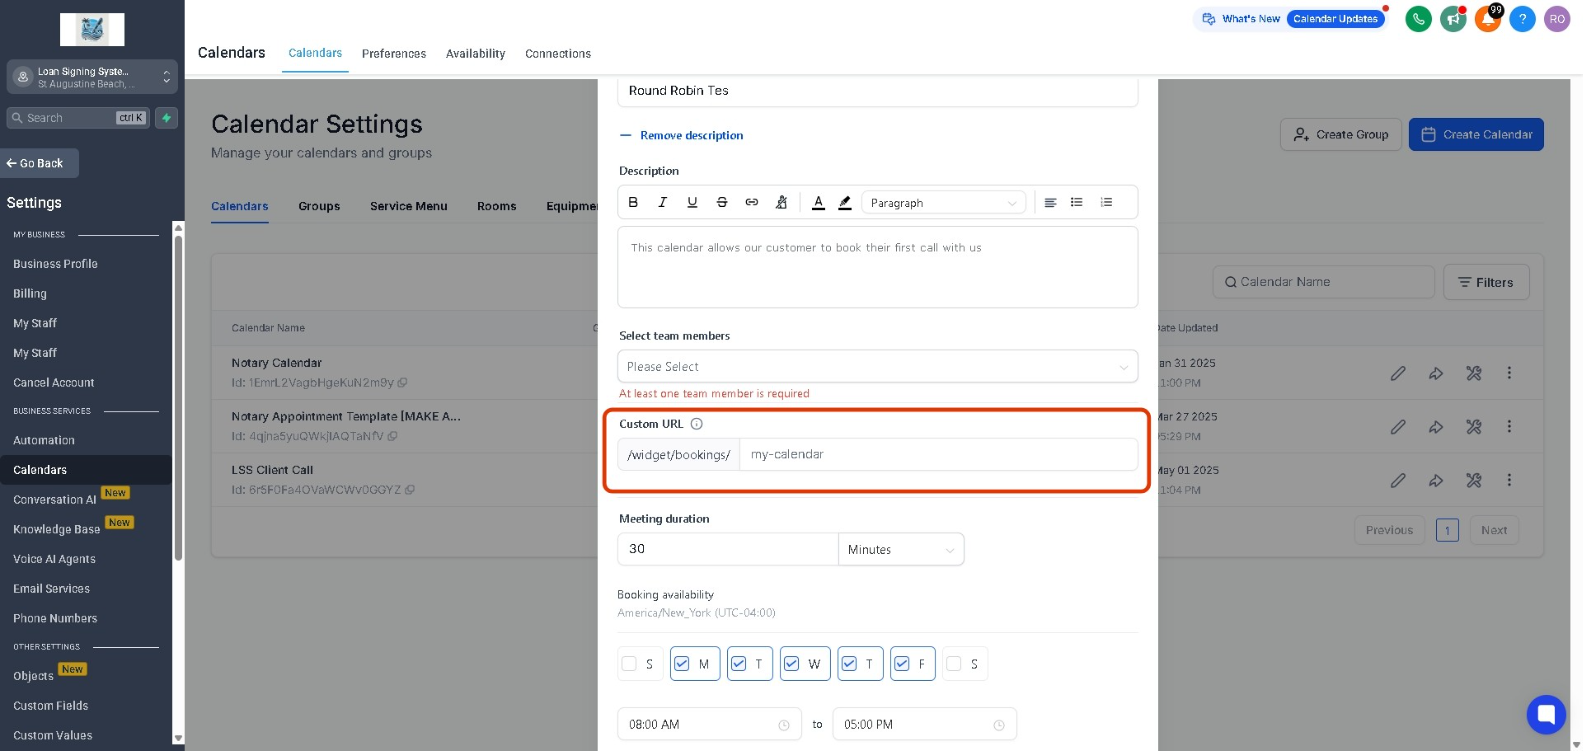
Step 4: Custom URL: Click on the textbox and type in your desired custom URL. The system will check the URL availability. If it's available, you'll see a checkmark indicating it's ready to use. If not, you'll need to modify it until you find an available one.
Step 5: Meeting Duration and Booking Availability: You can customize meeting durations in both minutes and hours, ensuring flexibility based on your business needs. You can set up your calendar based on team member preferences or company-wide scheduling policies. You can configure specific dates and exceptions, ensuring precise control over when appointments can be scheduled.
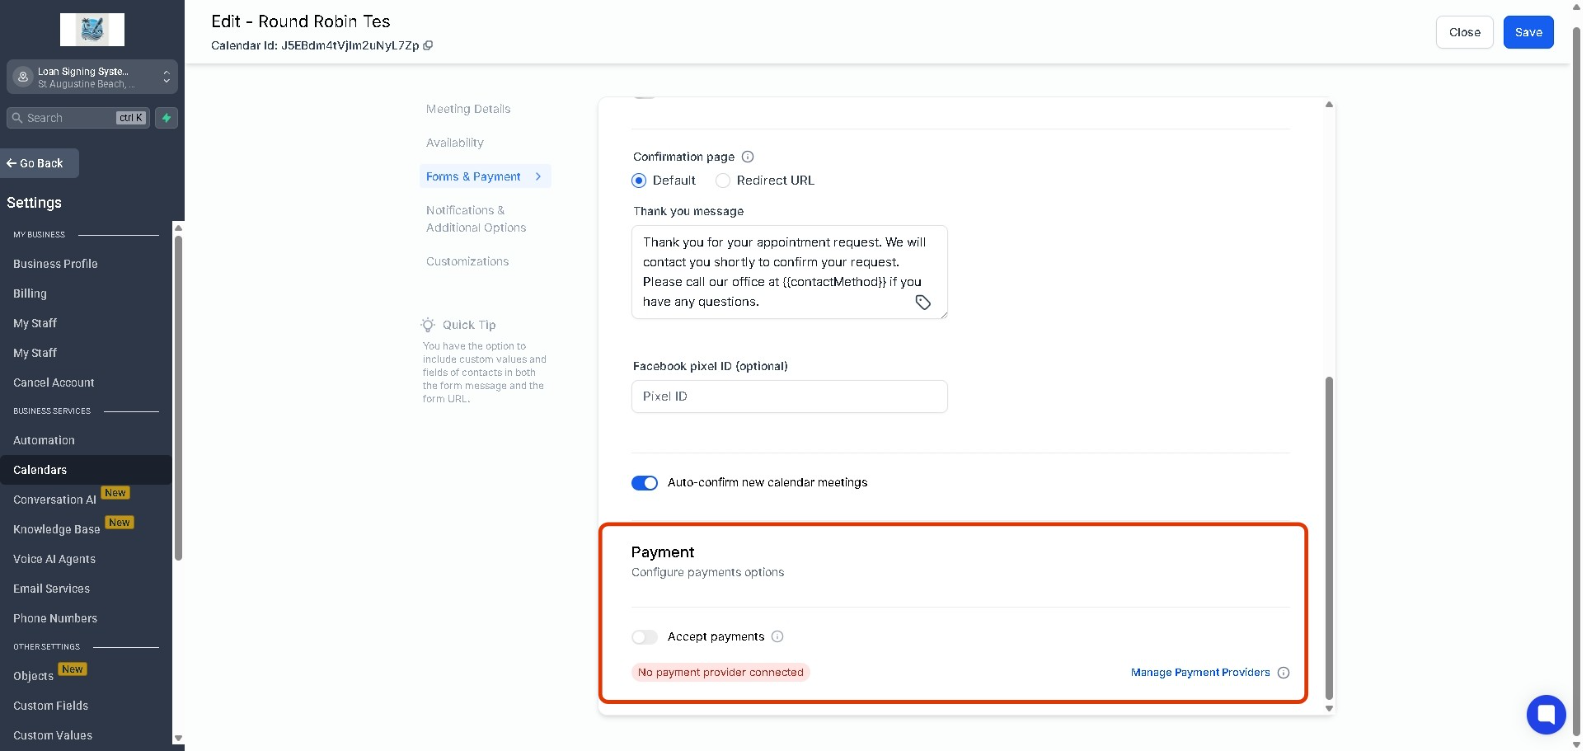
Step 6: Accept Payments: The Accept Payments tab allows you to enable payments directly through your calendar. If your services or products require payment, you can toggle this option to accept payments seamlessly during the booking process.
This also provides a variety of currency options, allowing Multiple Currency Support. You can add a Custom Description under the Payment Information section. This helps customers understand the payment terms, pricing details, or any special instructions before completing their booking.
Step 7: Save the Calendar: Once all the settings have been customized, click on Save to Create your Round-Robin Calendar.
