Completed Your Business Profile Setup with Your EIN in Step 1
Completed Your Privacy Policy, Terms of Service and Contact Form setup in Step 2
Have your LIVE Website ready to link for the contact page
Step 2. Configuring Privacy Policy, Terms of Service, and Contact Form
Editing Your Website: A Step-by-Step Guide
Step 1: Introduction to A2P Verification 0:00
Welcome to step three of the A2P verification process.
Ensure you have completed steps one and two before proceeding.
Skipping ahead will result in rejection and the need to resubmit.
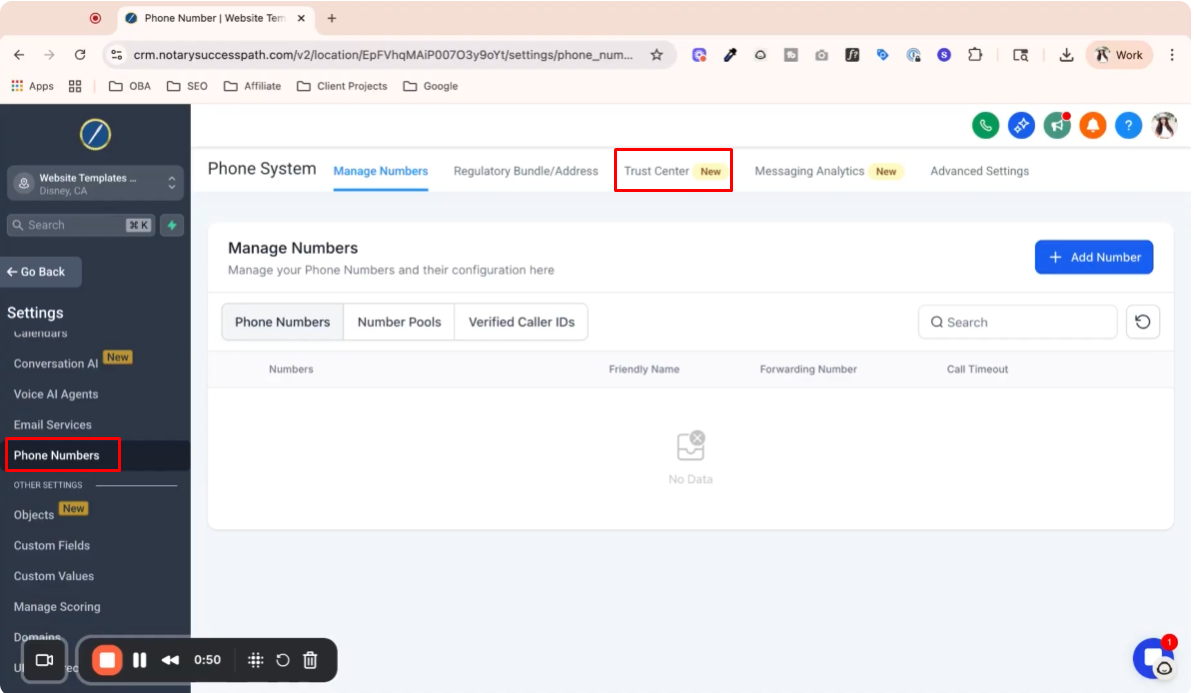
Step 2: Accessing the Trust Center 0:39
Navigate to the “Settings” in the bottom left corner.
Go to the “Phone Number” section to configure A2P verification in the “Trust Center”.
Step 3: Understanding A2P Compliance 1:13
Purchasing a phone number does not guarantee A2P compliance.
Begin the registration process in the “Trust Center”.

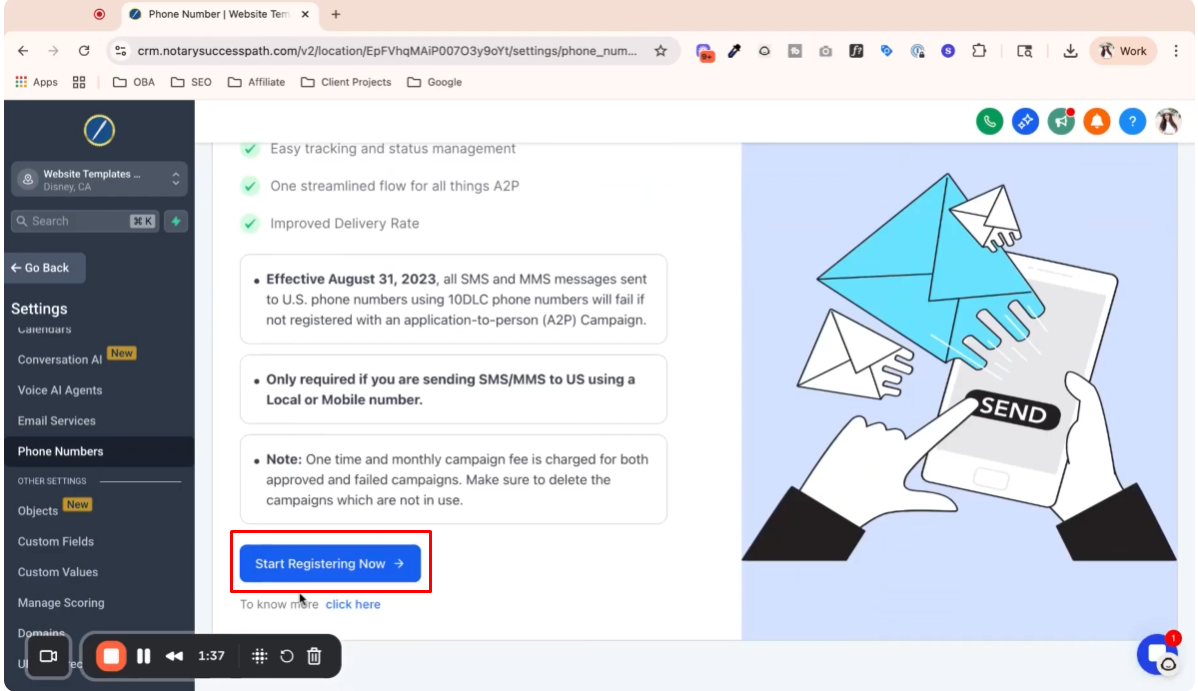
Step 4: Starting the Registration Process 1:37
Click on “Start Registering Now”.
The system will pull information from previous steps.
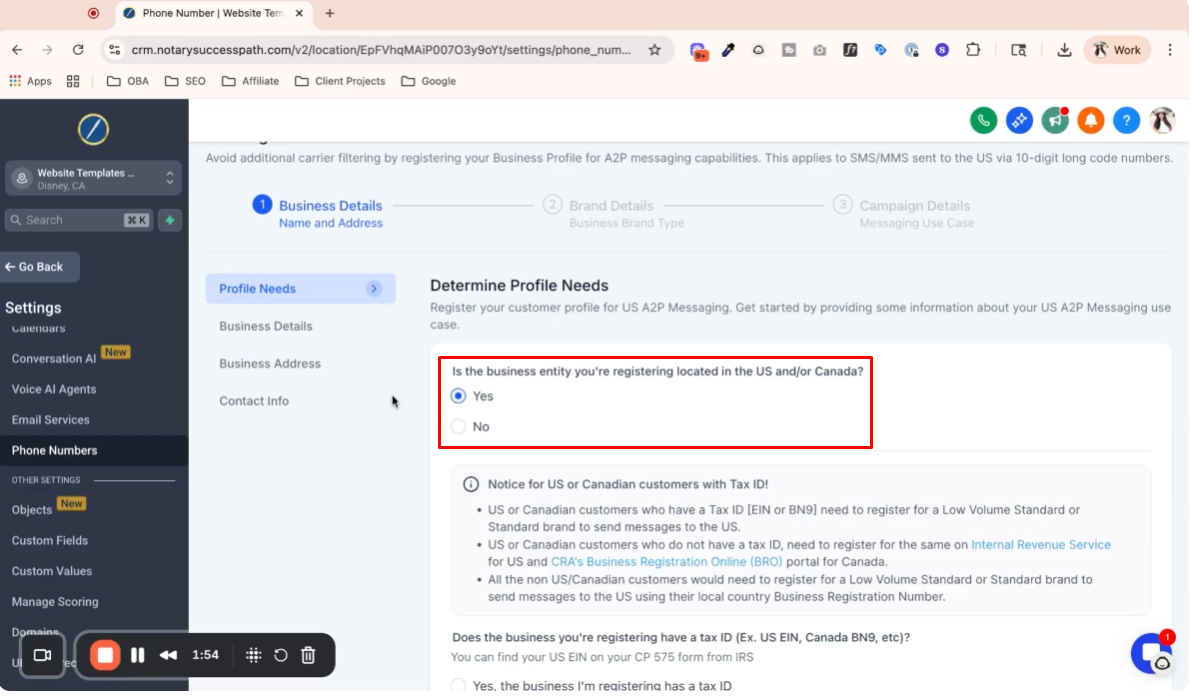
Step 5: Entering Business Information 1:55
Confirm that your business is registered in the US and Canada.
Ensure your business details auto-populate correctly.
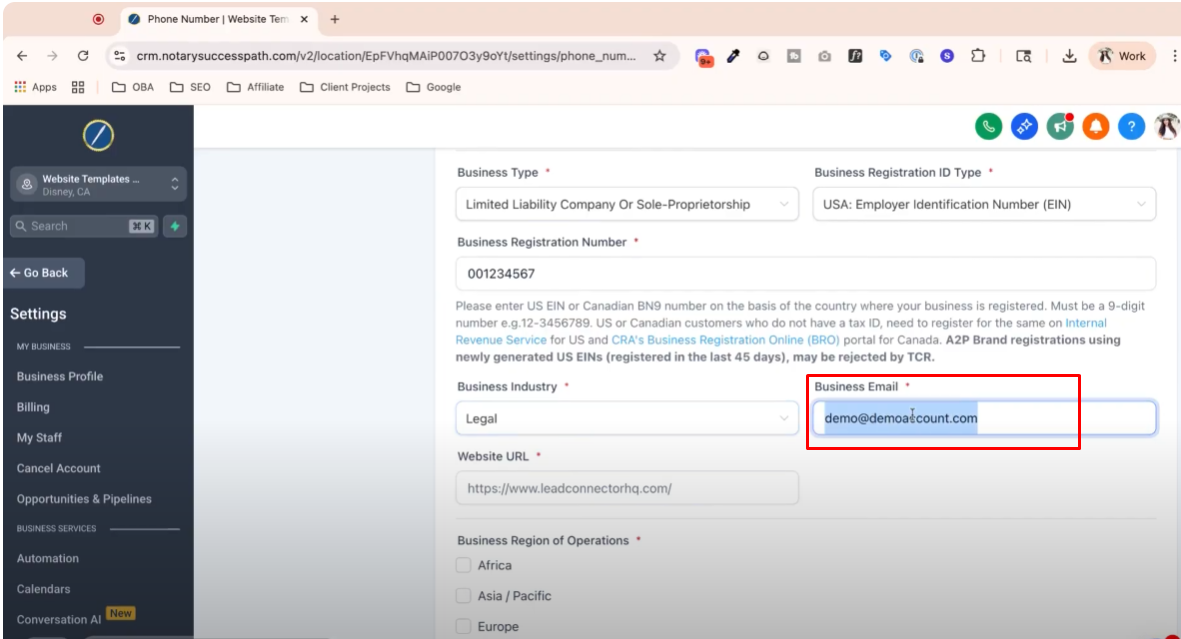
Step 6: Providing Business Details 2:34
Enter your business details and ensure it includes the correct domain for your business email.
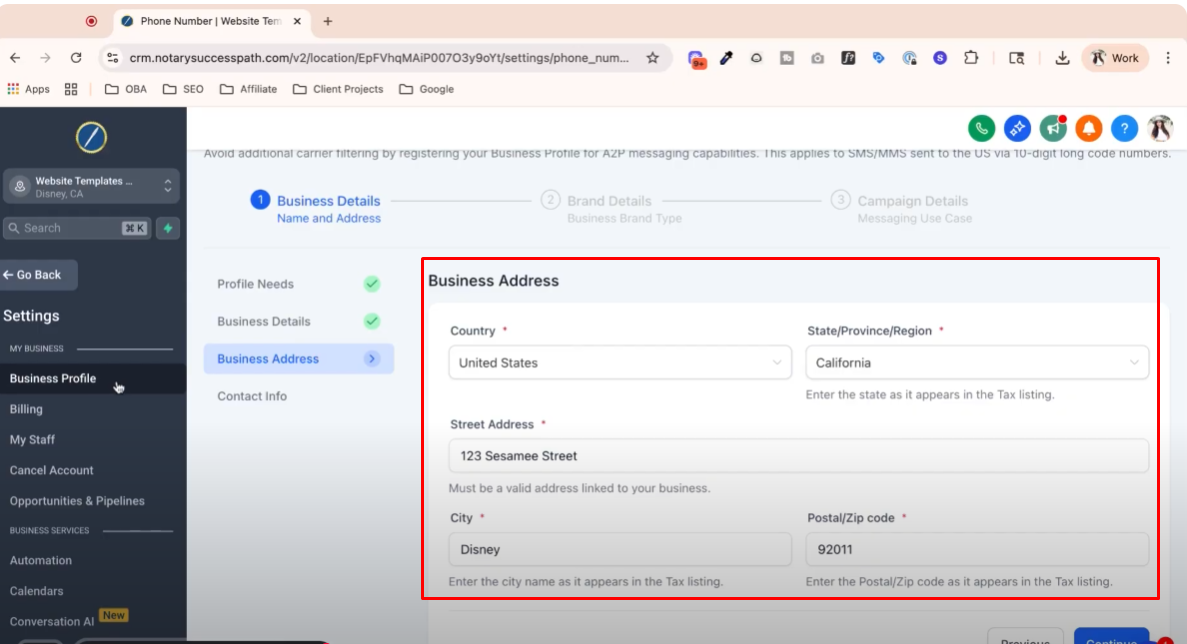
Step 7: Verifying Business Address 3:32
Verify the business address as pulled from your business profile.
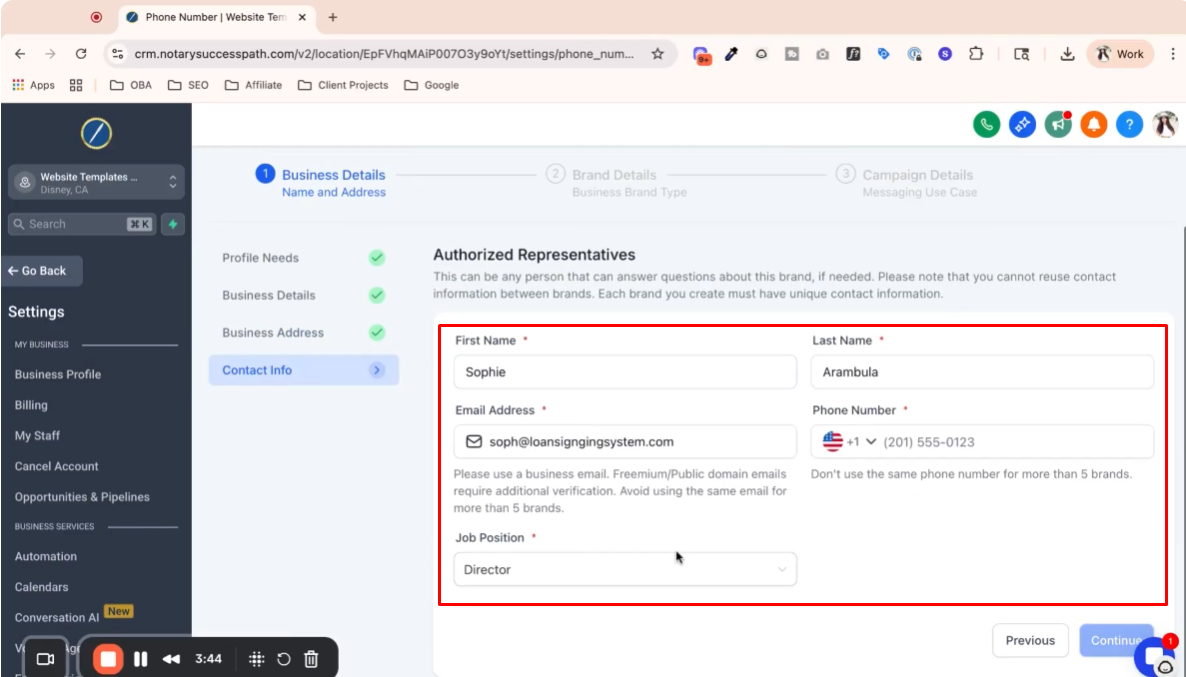
Step 8: Authorized Representative Information 3:43
Enter your information as the authorized representative, including a valid business email.
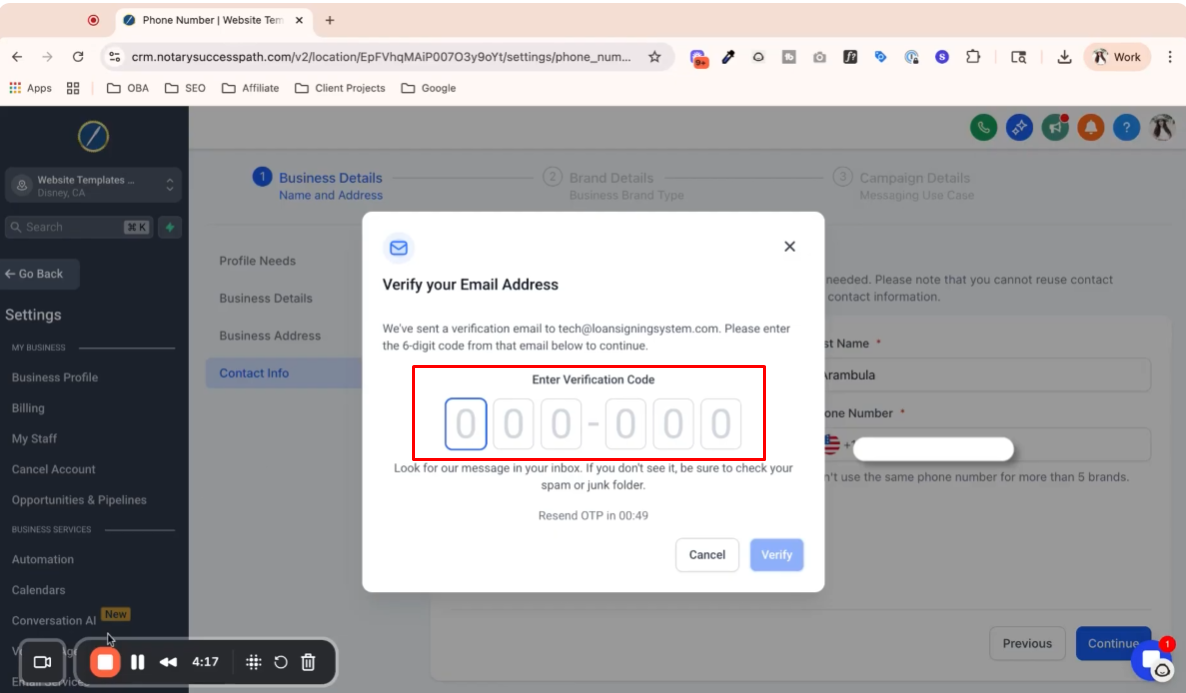
Step 9: Email Verification 3:55
Verify your email by entering the one-time password sent to your email.
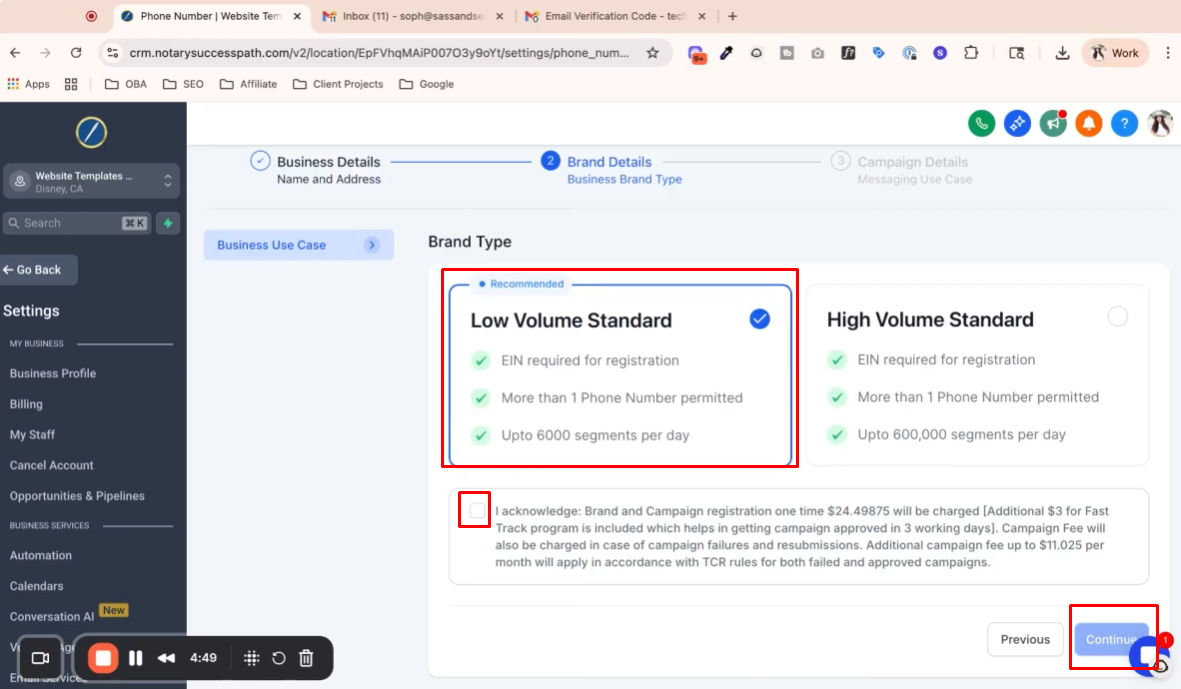
Step 10: Configuring A2P Settings 4:43
Choose the appropriate volume setting for your messaging needs (low volume standard or high volume).
Be aware of fees associated with verification and resubmissions.
Step 11: Use Case Examples 5:49
Copy and paste use case examples relevant to your business.
Update the examples with your company name and ensure they match your EIN.

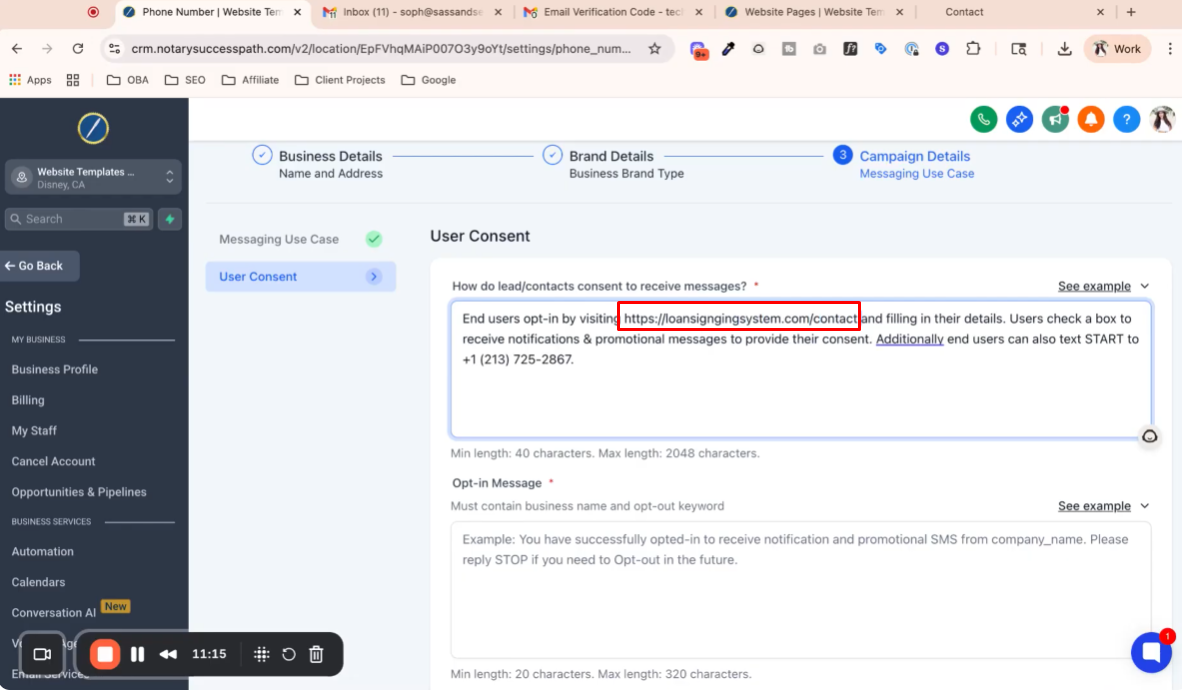
Step 12: Updating Contact Page URL 9:04
Include the URL for your contact page where users can opt-in.
Ensure this is your actual website URL, not a template.
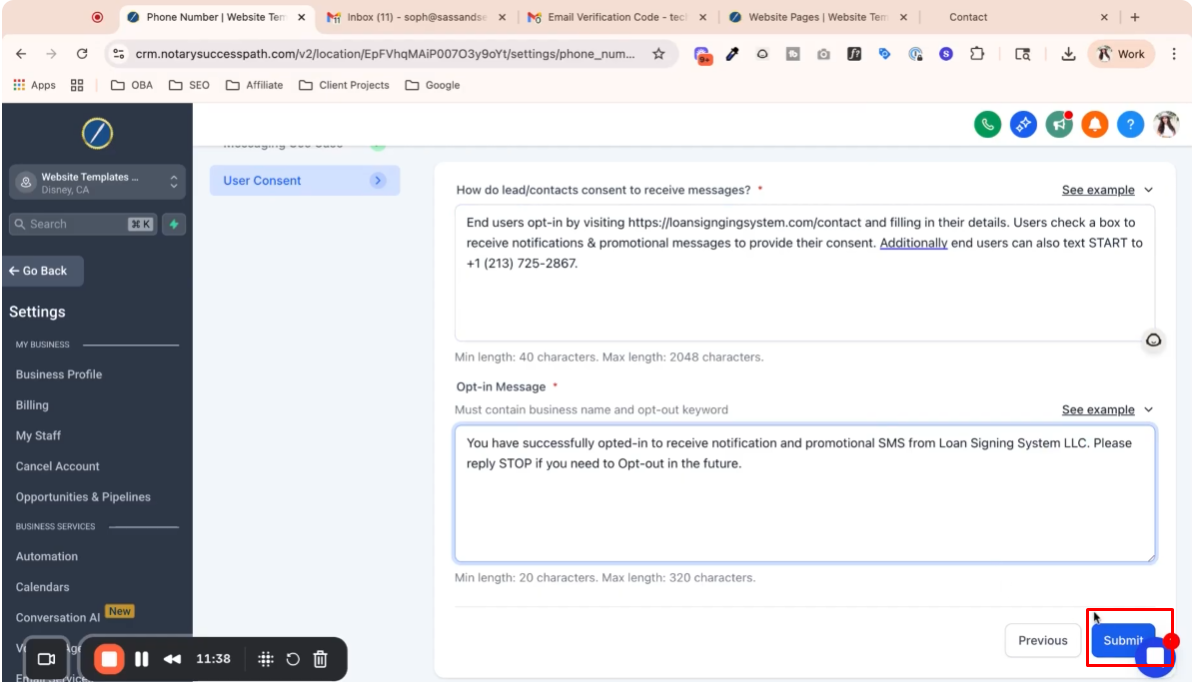
Step 13: Finalizing Submission 11:31
Review all entries and ensure they are accurate.
Click submit to complete the A2P verification process.
Step 14: Monitoring Verification Status 12:24
Check the “Trust Center” for the status of your A2P verification.
Approval may take a few hours to a couple of days.
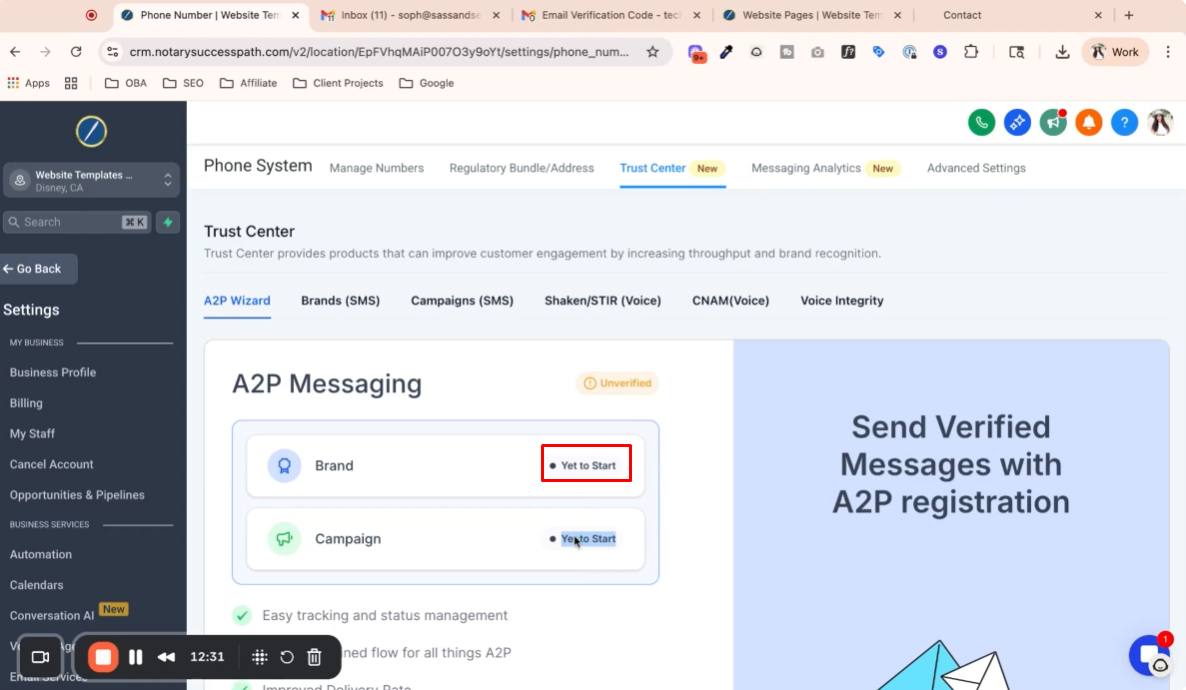
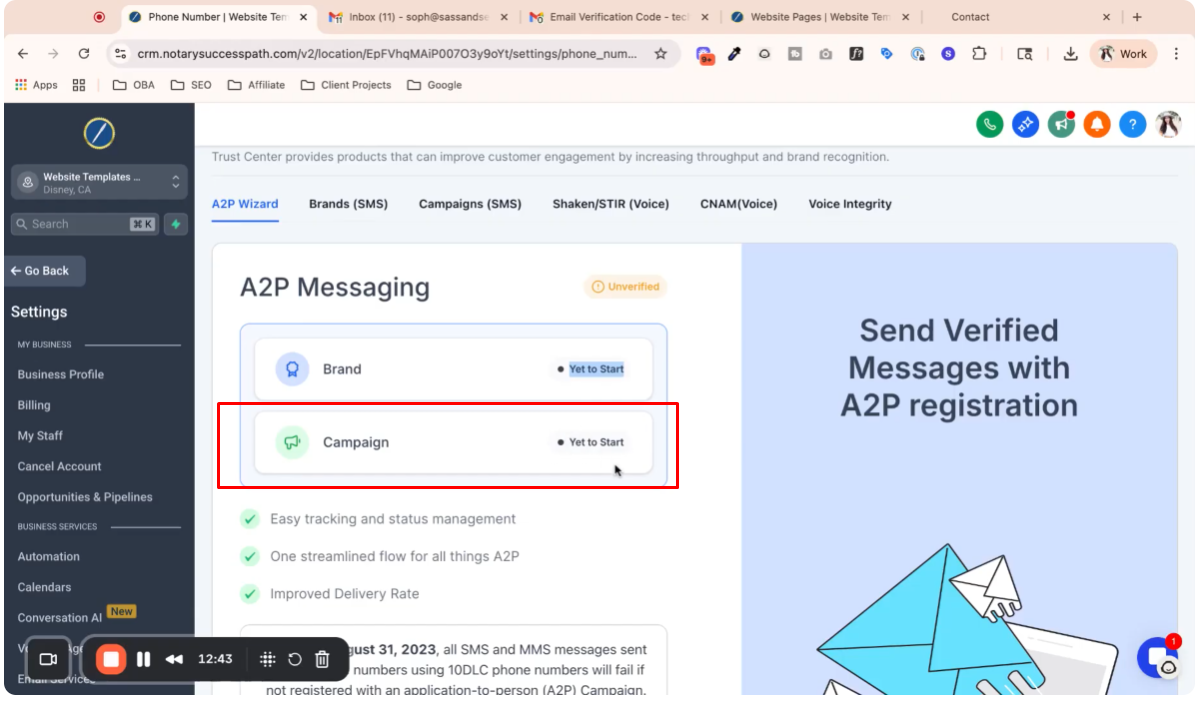
Step 15: Next Steps After Approval 12:38
After brand verification, proceed to campaign approval by starting the verification process again.
Step 16: Conclusion 12:58
Follow these steps carefully to avoid rejection.
Contact support if you encounter issues, but you must complete the process yourself.
