Completed Your Business Profile Setup with Your EIN in Step 1
Completed Your Privacy Policy, Terms of Service and Contact Form setup in Step 2
Completed The A2P Verification Process
Completed Selecting Phone Number and Configuring Settings
Step 2. Configuring Privacy Policy, Terms of Service, and Contact Form
Editing Your Website: A Step-by-Step Guide
Step 3. Completing The A2P Verification Form For Brand and Campaign
Step 4. Selecting a Phone Number & Configuring Settings
Step 1: Introduction 0:00
Ensure you completed all previous steps for this to work correctly.
Step 2: Adding Verified CallerID 0:32
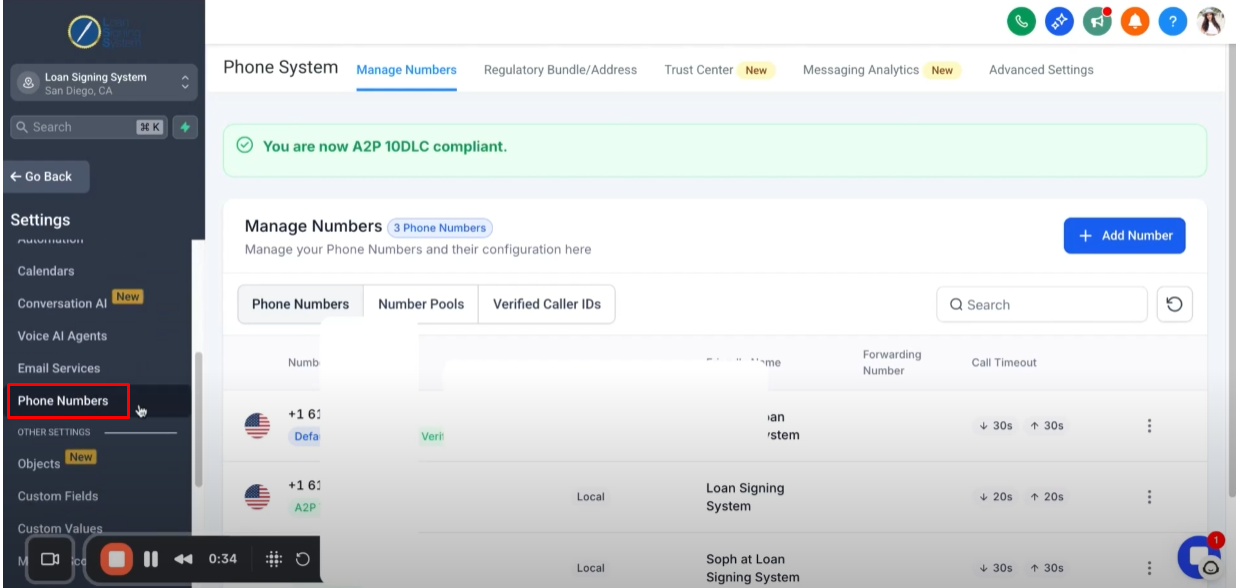
Click “Phone Numbers”.
Click “Verified Caller IDs”.
The Verified Caller IDs allows you to essentially mask your phone number.

Click the “Add Number” button and select “Add Verified CallerID”.
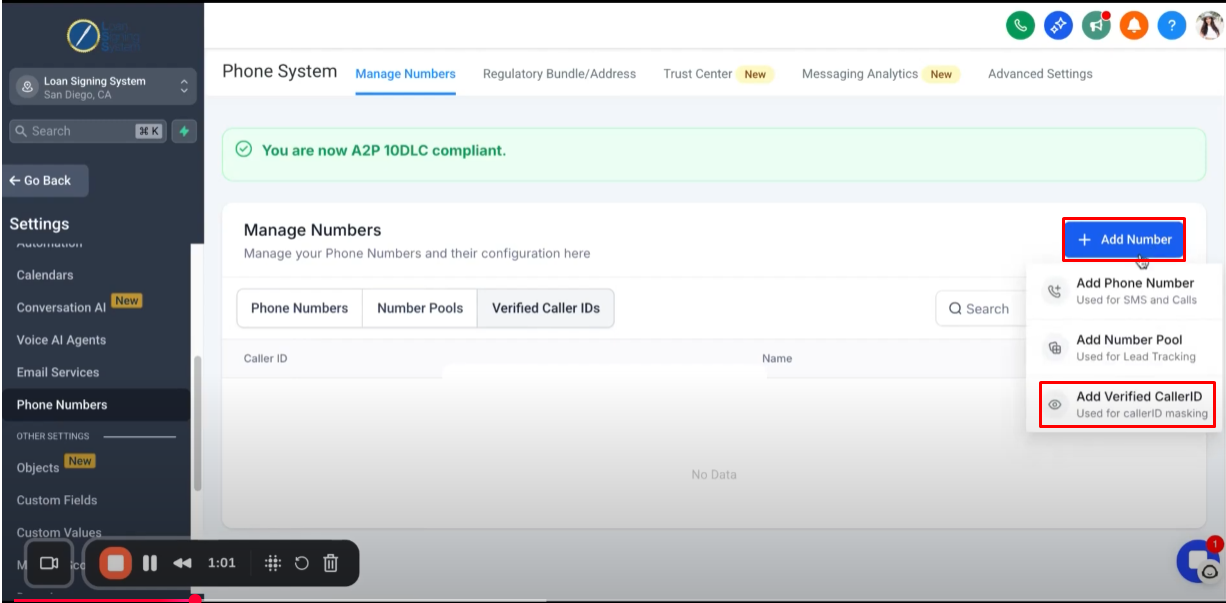
You need add a verified Caller ID.
Enter your preferred phone number and ensure you have access to it, as a verification code will be sent to this number. Once you receive the code, enter it to complete the verification.

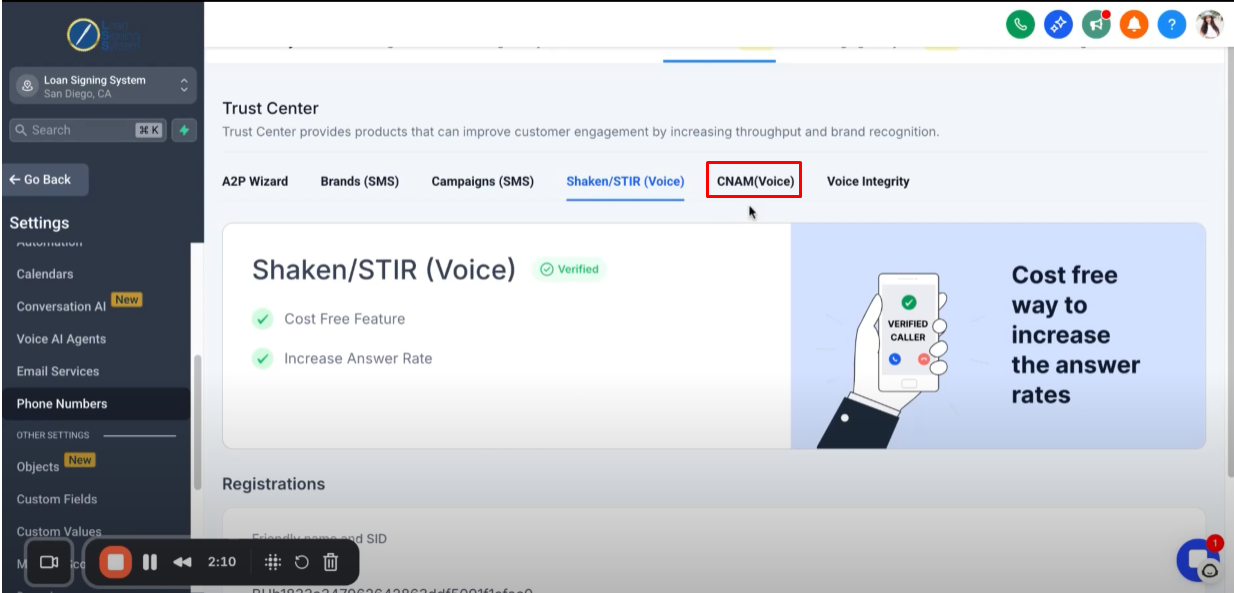
Step 3: Configure Trust Center 1:33
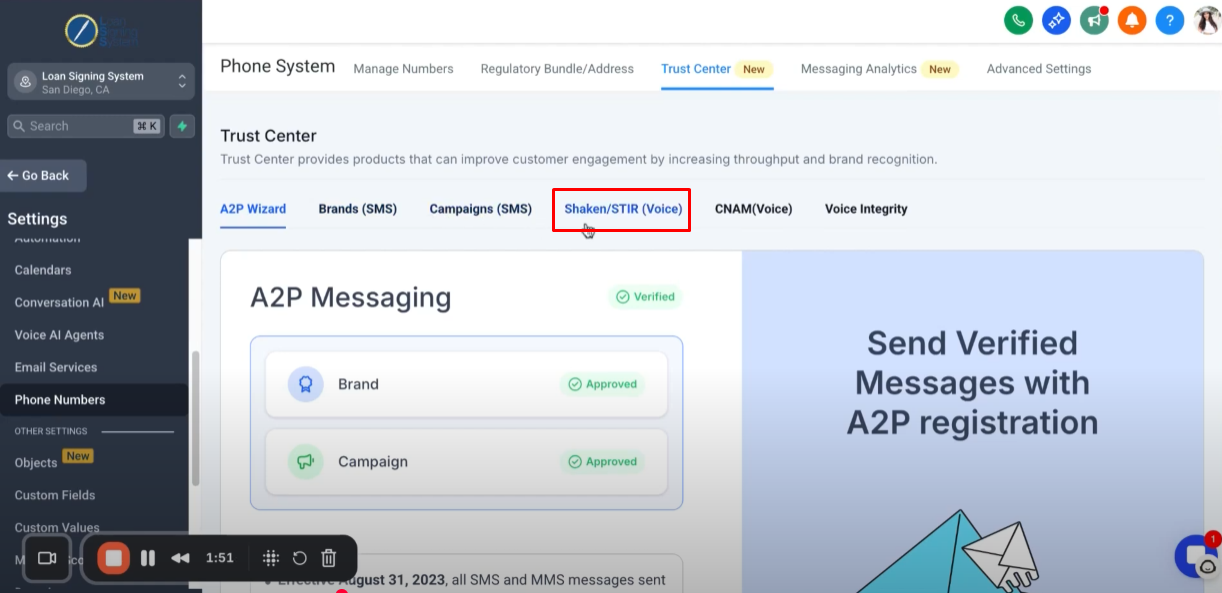
Click “Trust Center”.

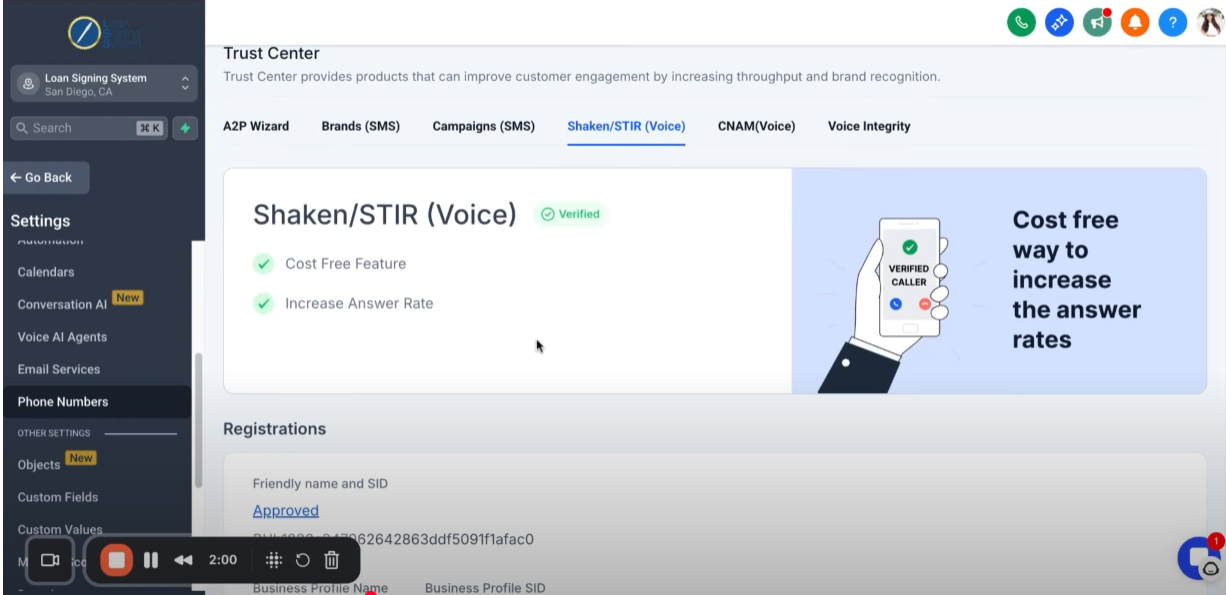
Click “Shaken/STIR (Voice)”.
This helps you have higher answer rate.
As long as your gotten approved with your A2P, you should be able to get through this process with no issues.
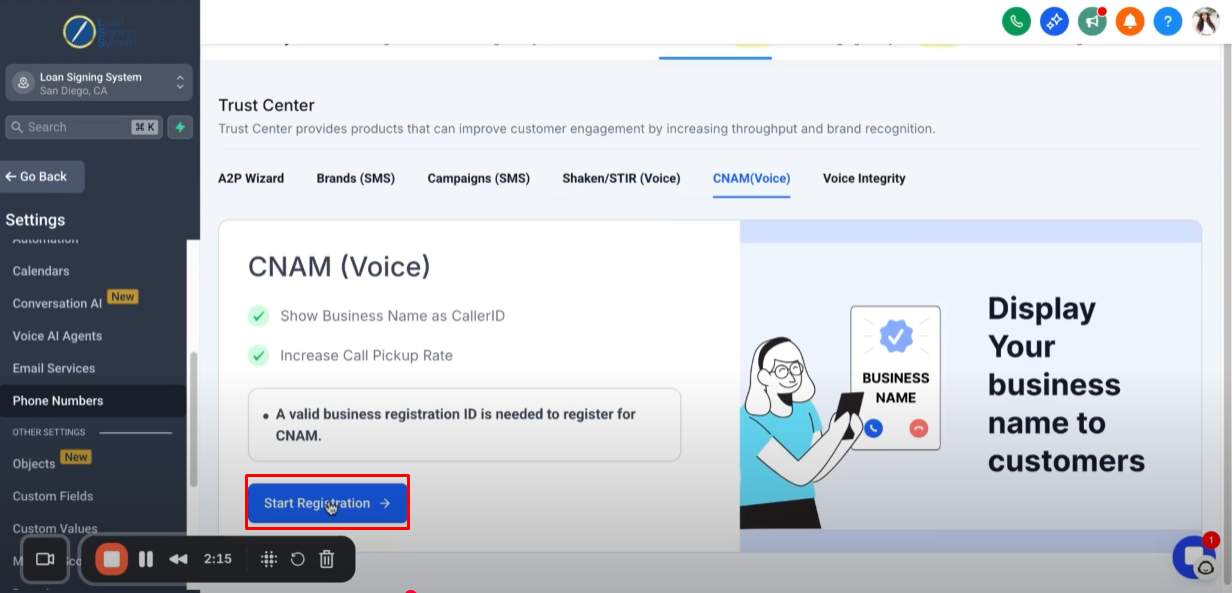
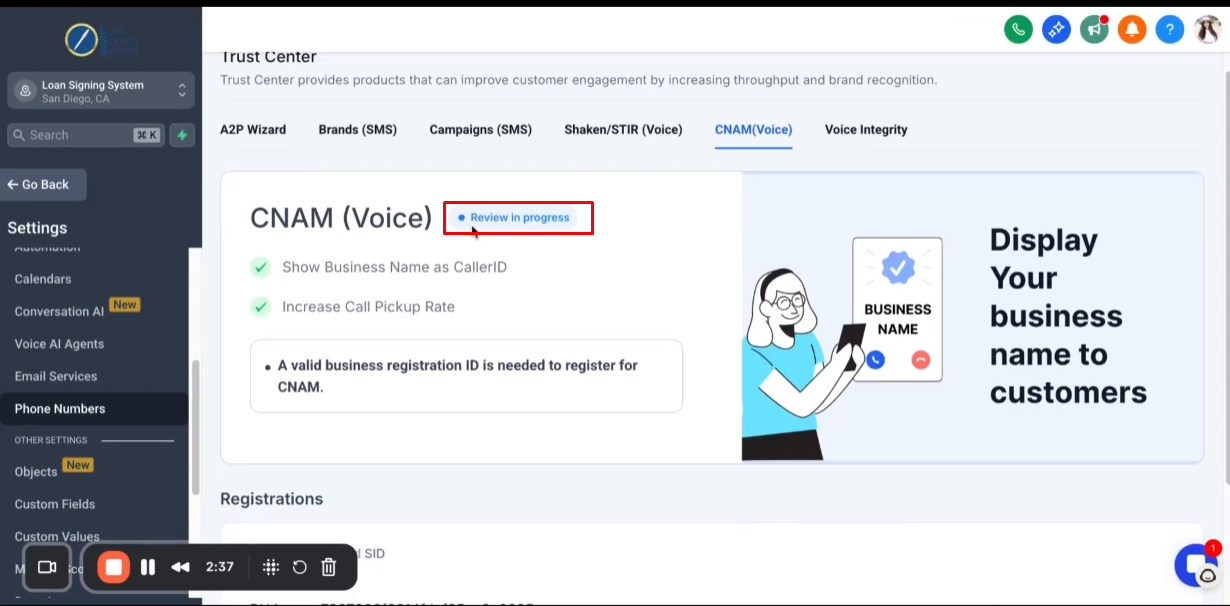
Click “CNAM (Voice)”.
Click “Start Registration”.
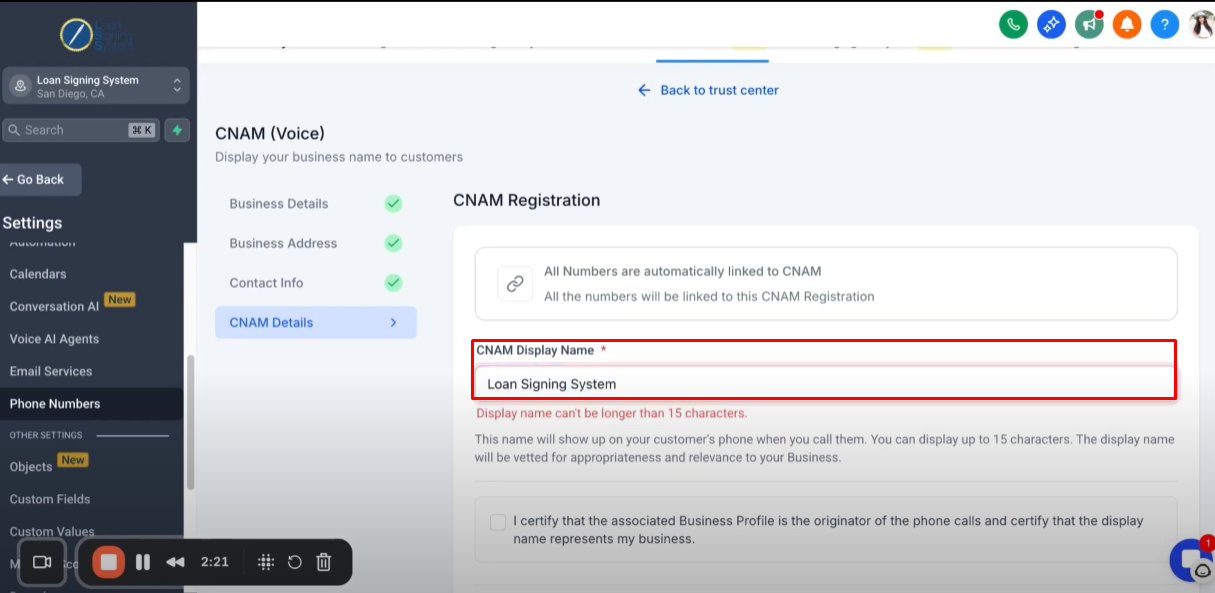
Enter your “Business Name”.
Please note that display name can’t be longer than 15 characters.
Click “I certify” then submit.
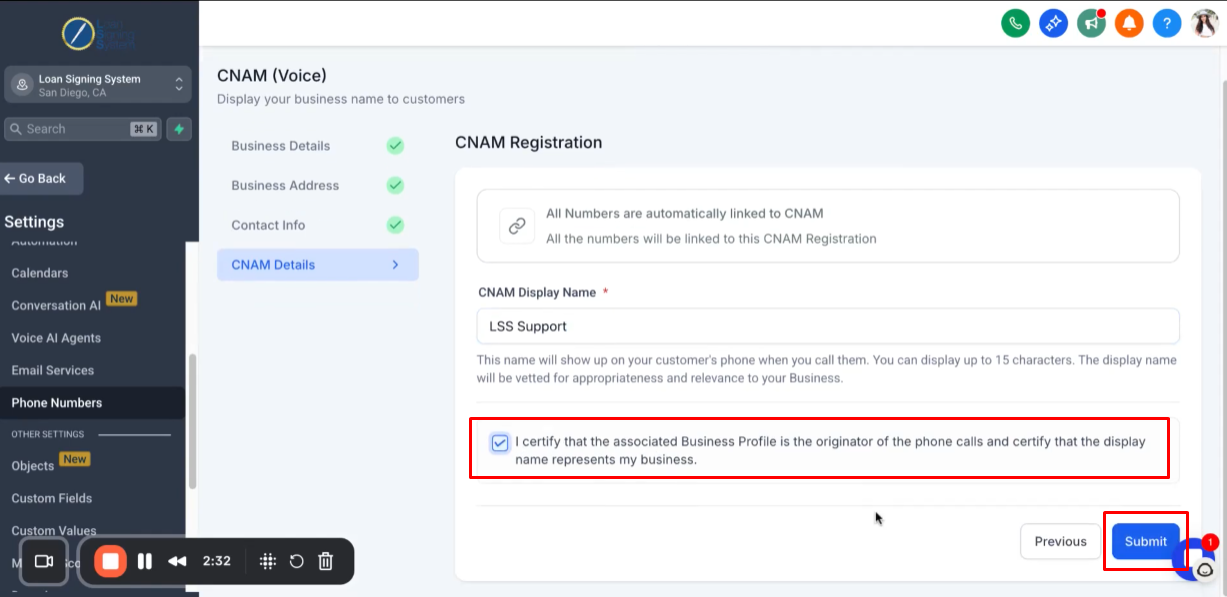
After submitting, it will review in progress.
Click “Voice Integrity”.
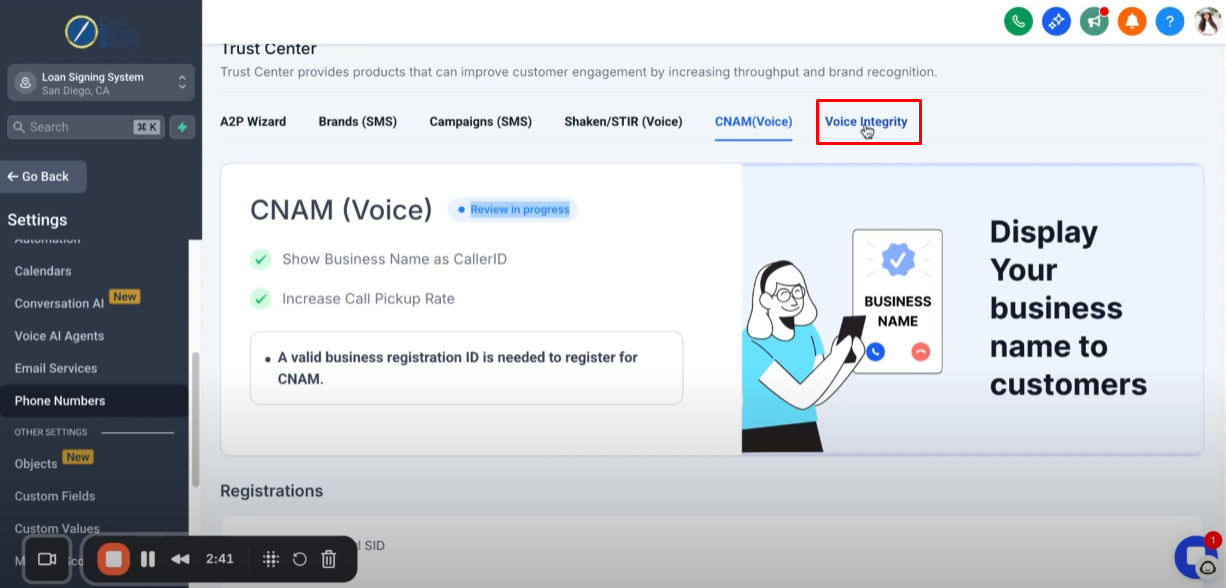
Select a use case on how Voice Integrity will be used.
Depending on what you’re using it for.

Enter Employee Count and Average Business Day Call Volume then click Submit.

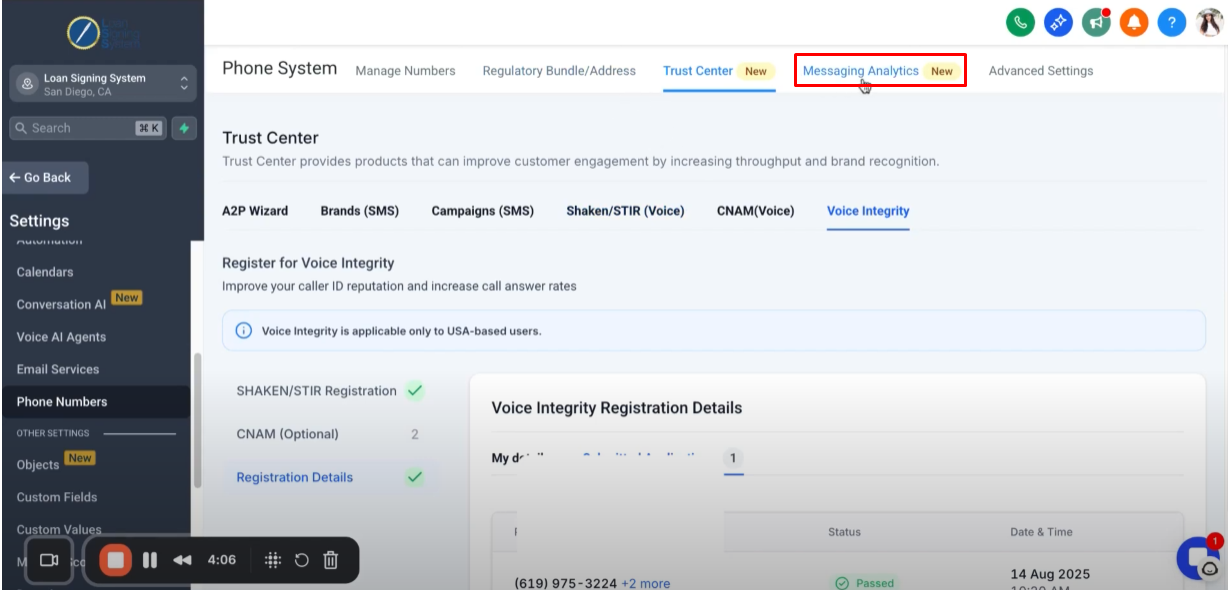
As long as you are all set-up with A2P process, Brand (SMS) and the Campaign (SMS). These steps will be quick and easy.
Make sure that you completed all the previous steps for this work successfully.
Step 4: Monitoring Messaging Analytics 4:03
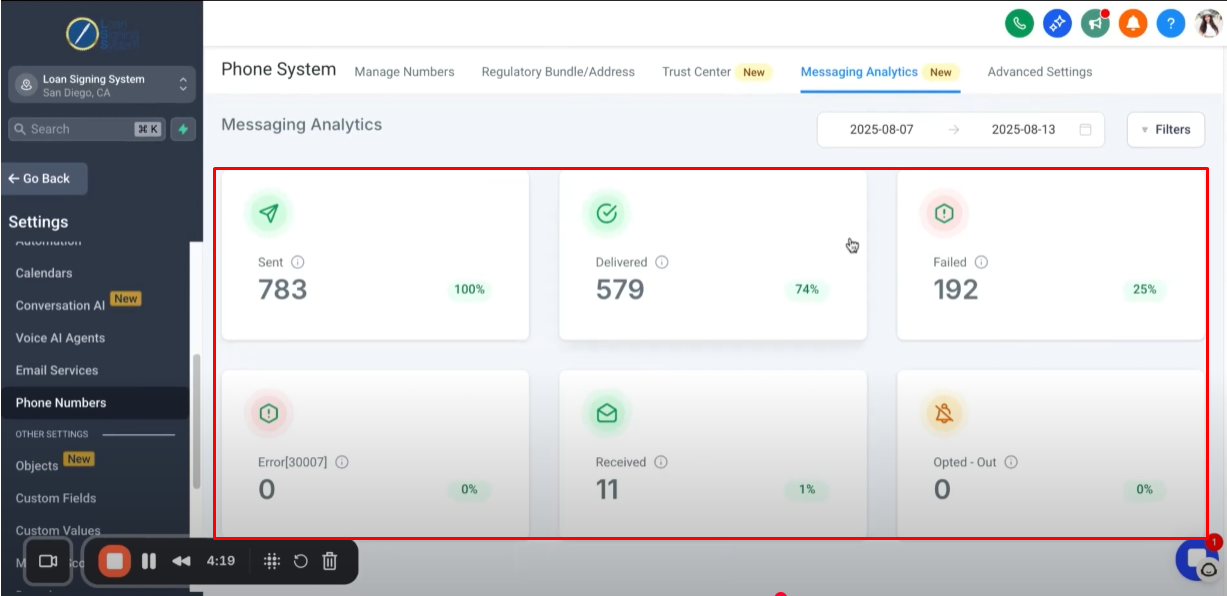
Click “Messaging Analytics”.
This is where you will see specific details pertaining the use of text messages for any period of time.
You can track the text messages that is sent, delivered, failed, received and etc.
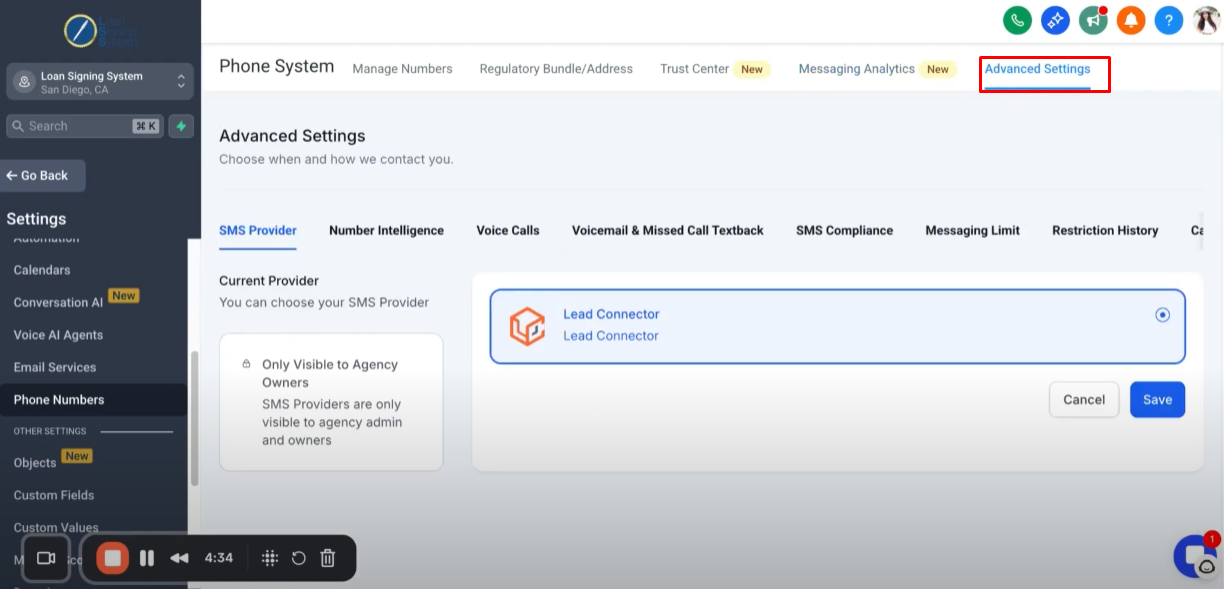
Step 5: Configuring Advanced Settings 4:31
Click “Advanced Settings”.
This is where you see additional settings pertaining to the use of phone number.
Click “Number Intelligence”.
Check “Gather Intelligence on Unknown Phone Numbers”, it detect spam phone calls.
It will be great if you get a lot of spam calls

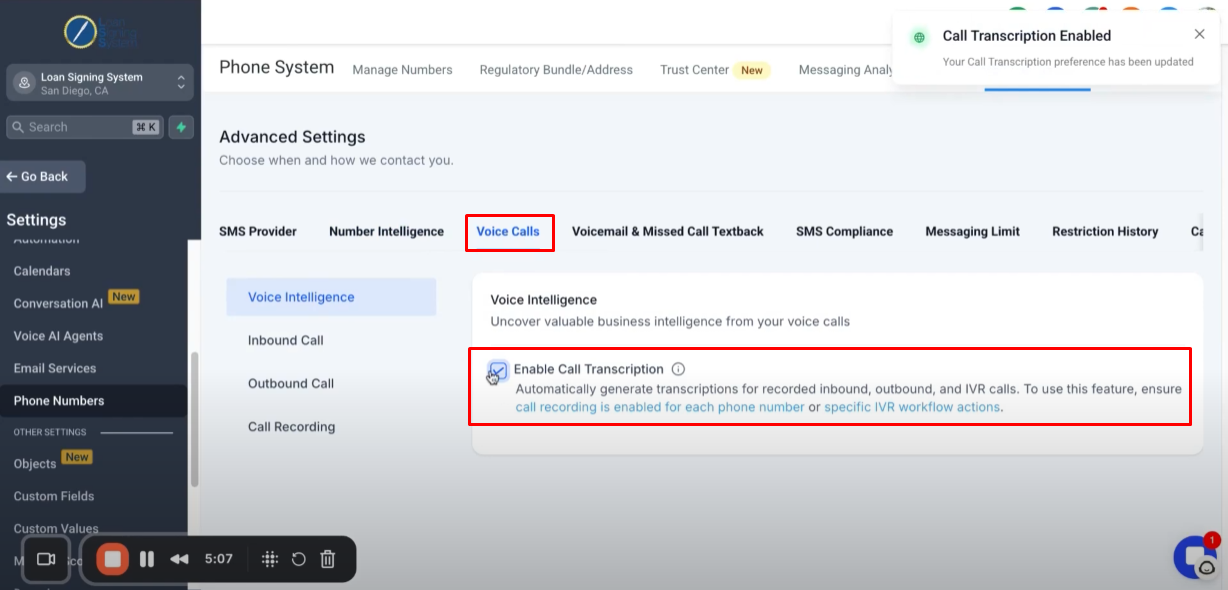
Click “Voice Calls”.
Check “Enable Call Transcriptions”, so when it record the phone calls it will have a transcript that easy for you to reference and go back to.
Click “Inbound Call”.

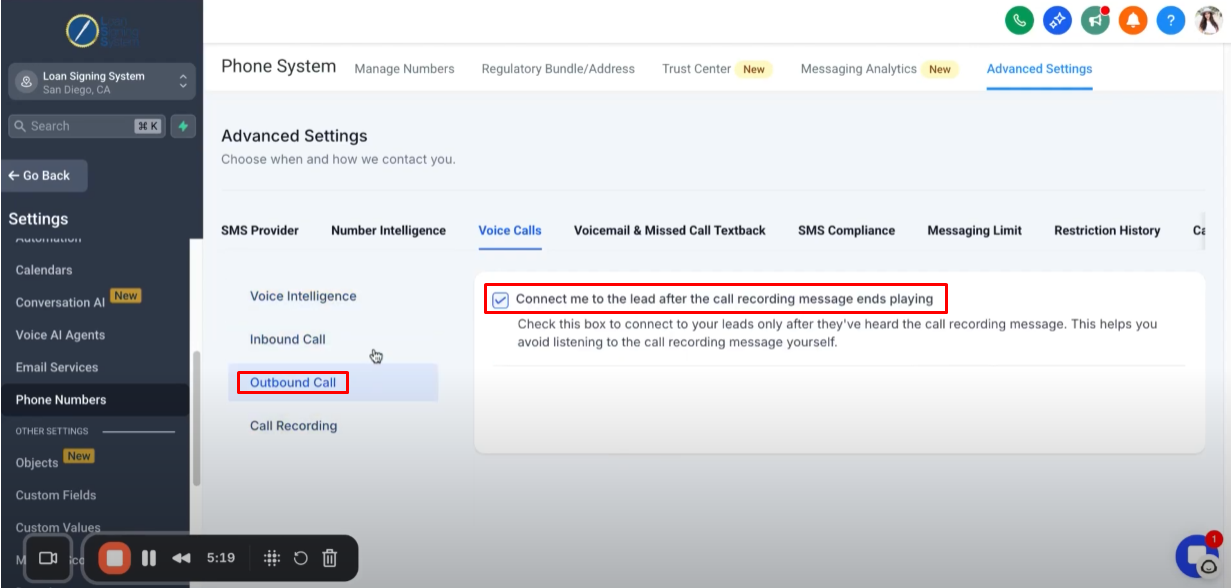
Click “Outbound Call”.
Click “Call Recording”.
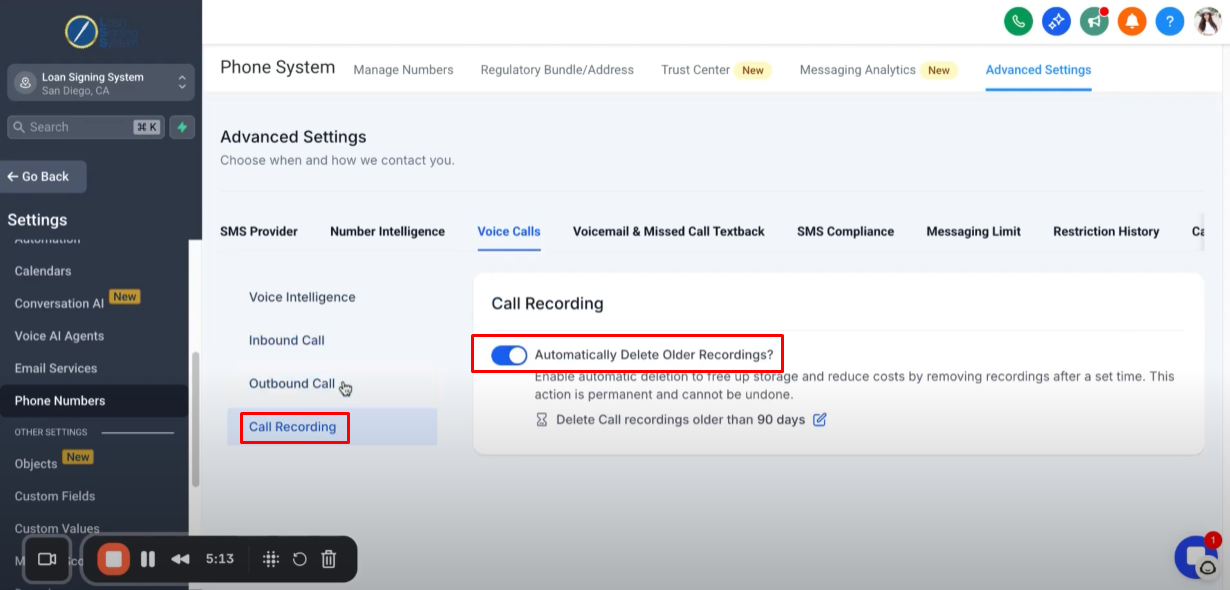
You can configure all the options under “Voice Calls” shown above, but my recommendation is to leave those on.
This is where you can upload your default voicemail whenever somebody is calling and you’re not able to answer the phone call.

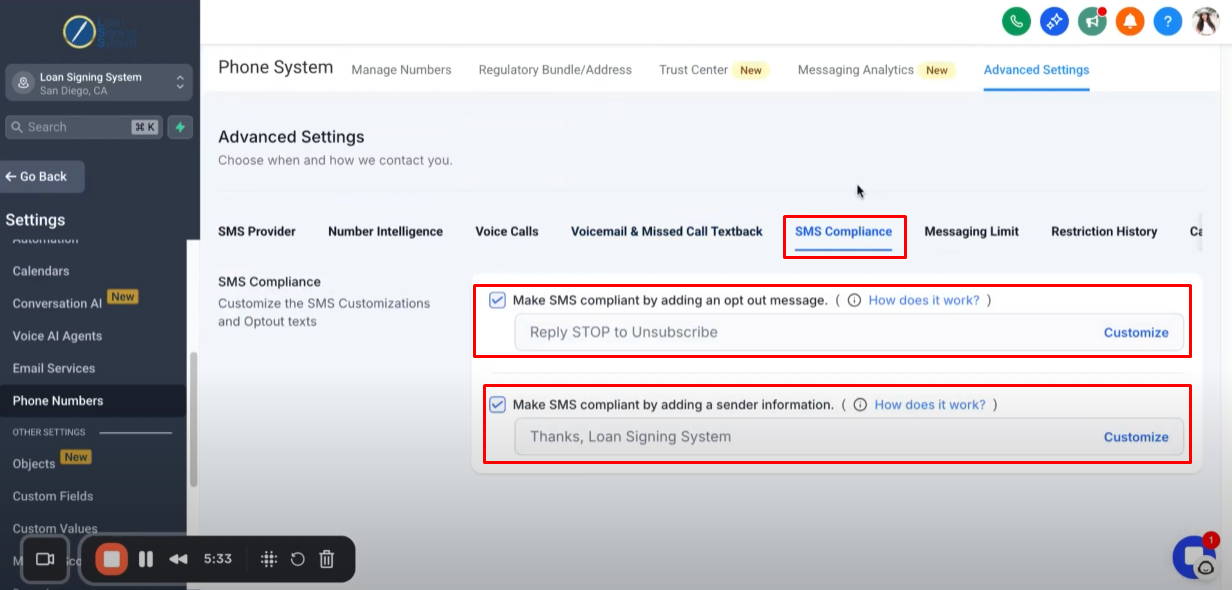
Click “SMS Compliance” and leave both of two options ON, it is part of requirements for sending text messages.
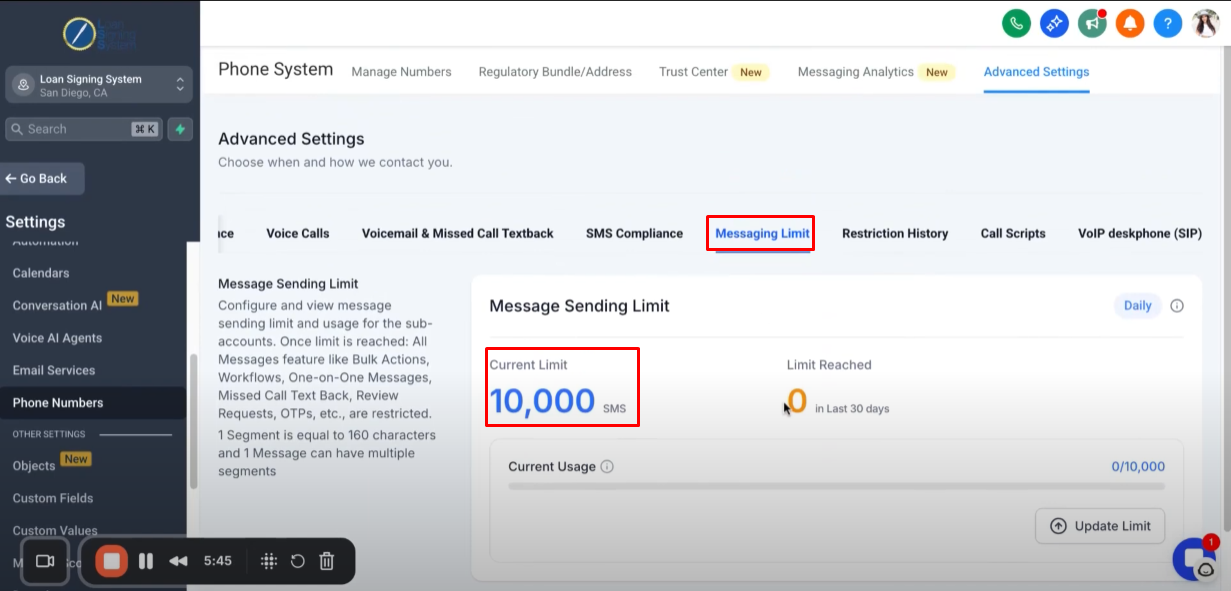
Click “Messaging Limit”, this is where you can choose how many messages you’re sending per day, you can stay within those limits.
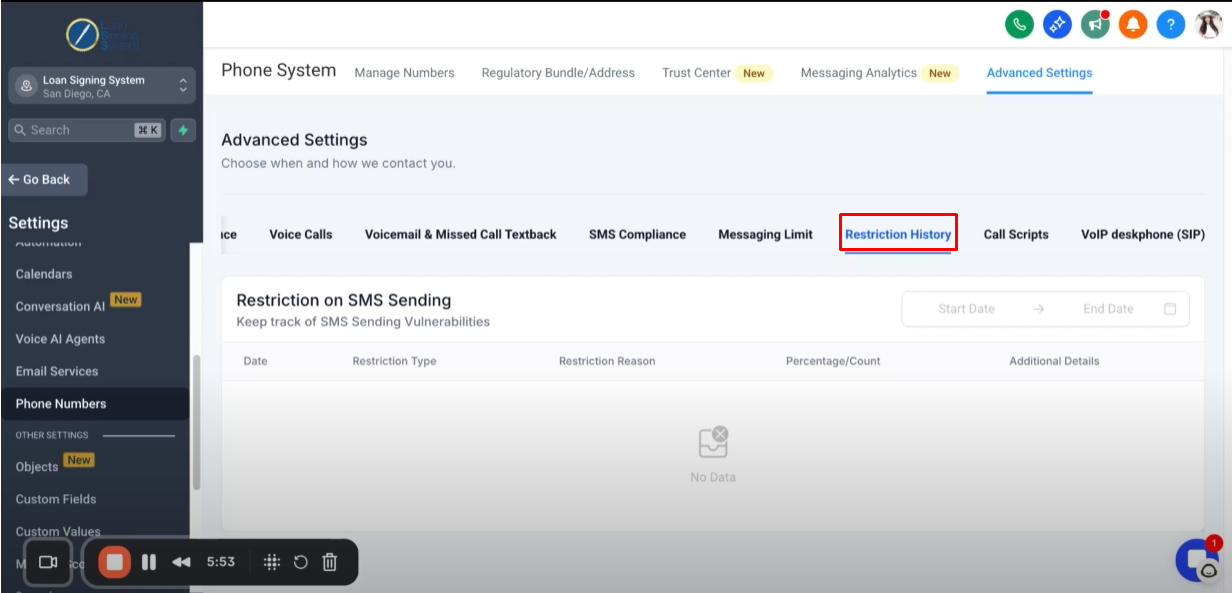
Click “Restriction History”, this is where you see any kind of messages that may have been restricted.
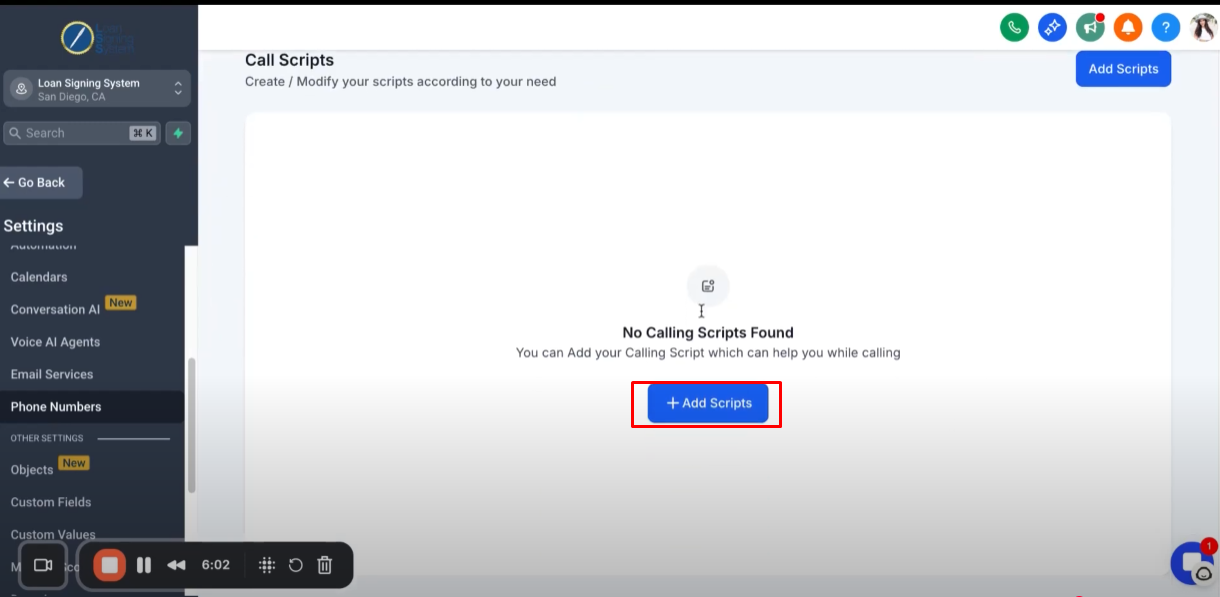
Click “Call Scripts”.

You can choose to upload your specific call scripts.
Most folks won’t be using this options so it’s not something you’ll need to worry about.
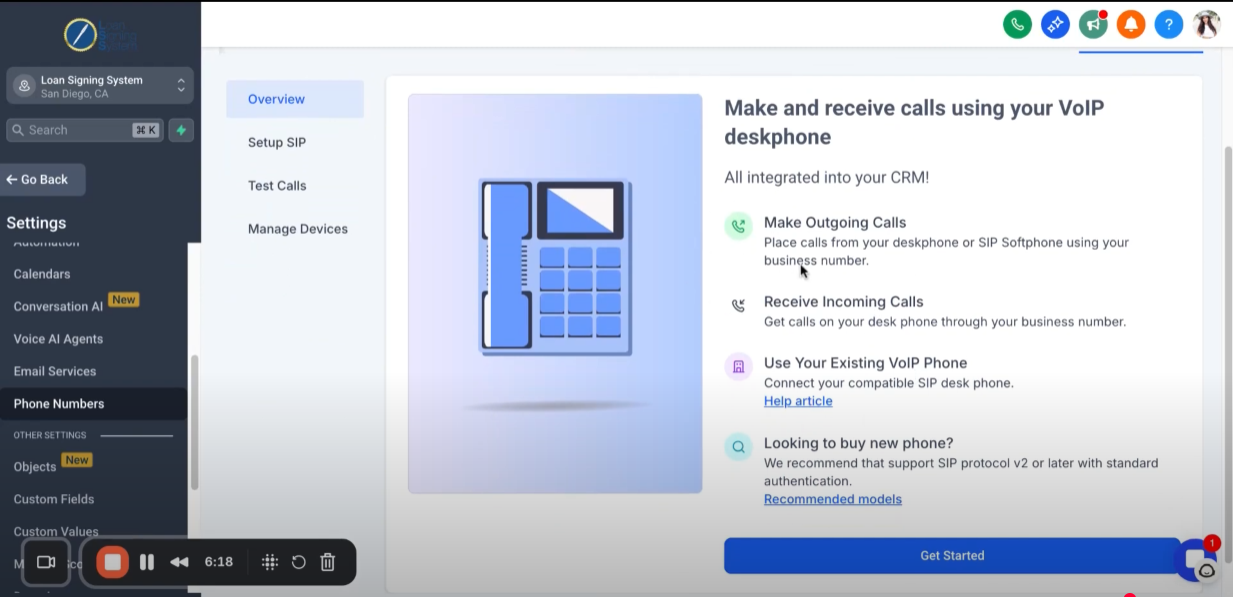
Click “VoIP deskphone (SIP)”.
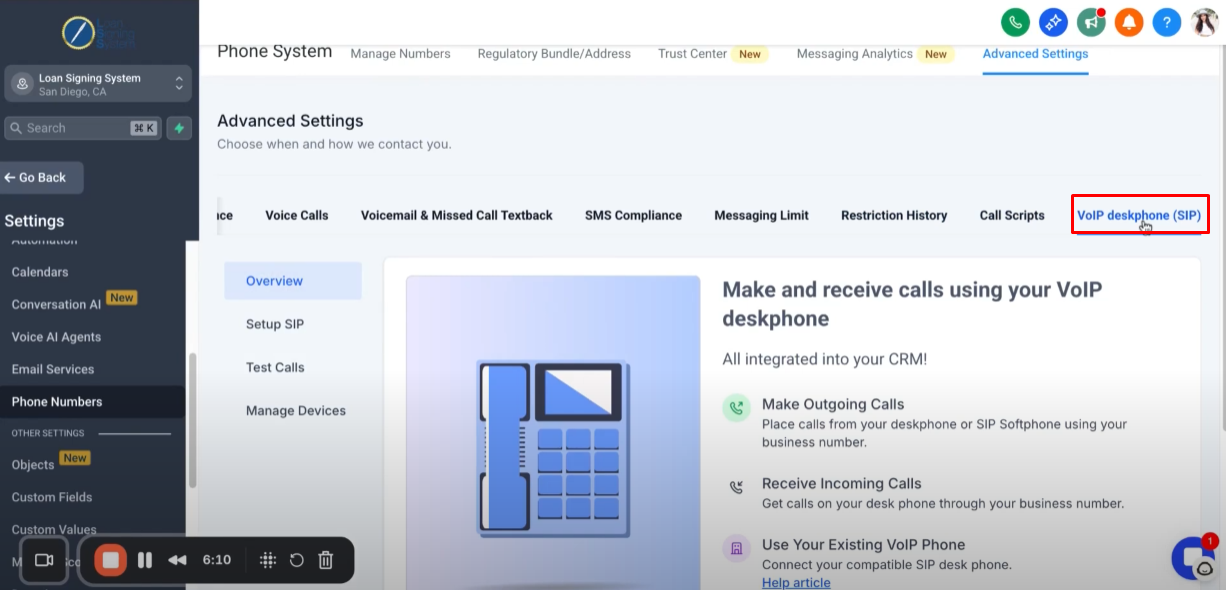
This is where you can make outgoing calls from your desktop.
In most cases, you can use the phone system already by clicking the Call icon.

