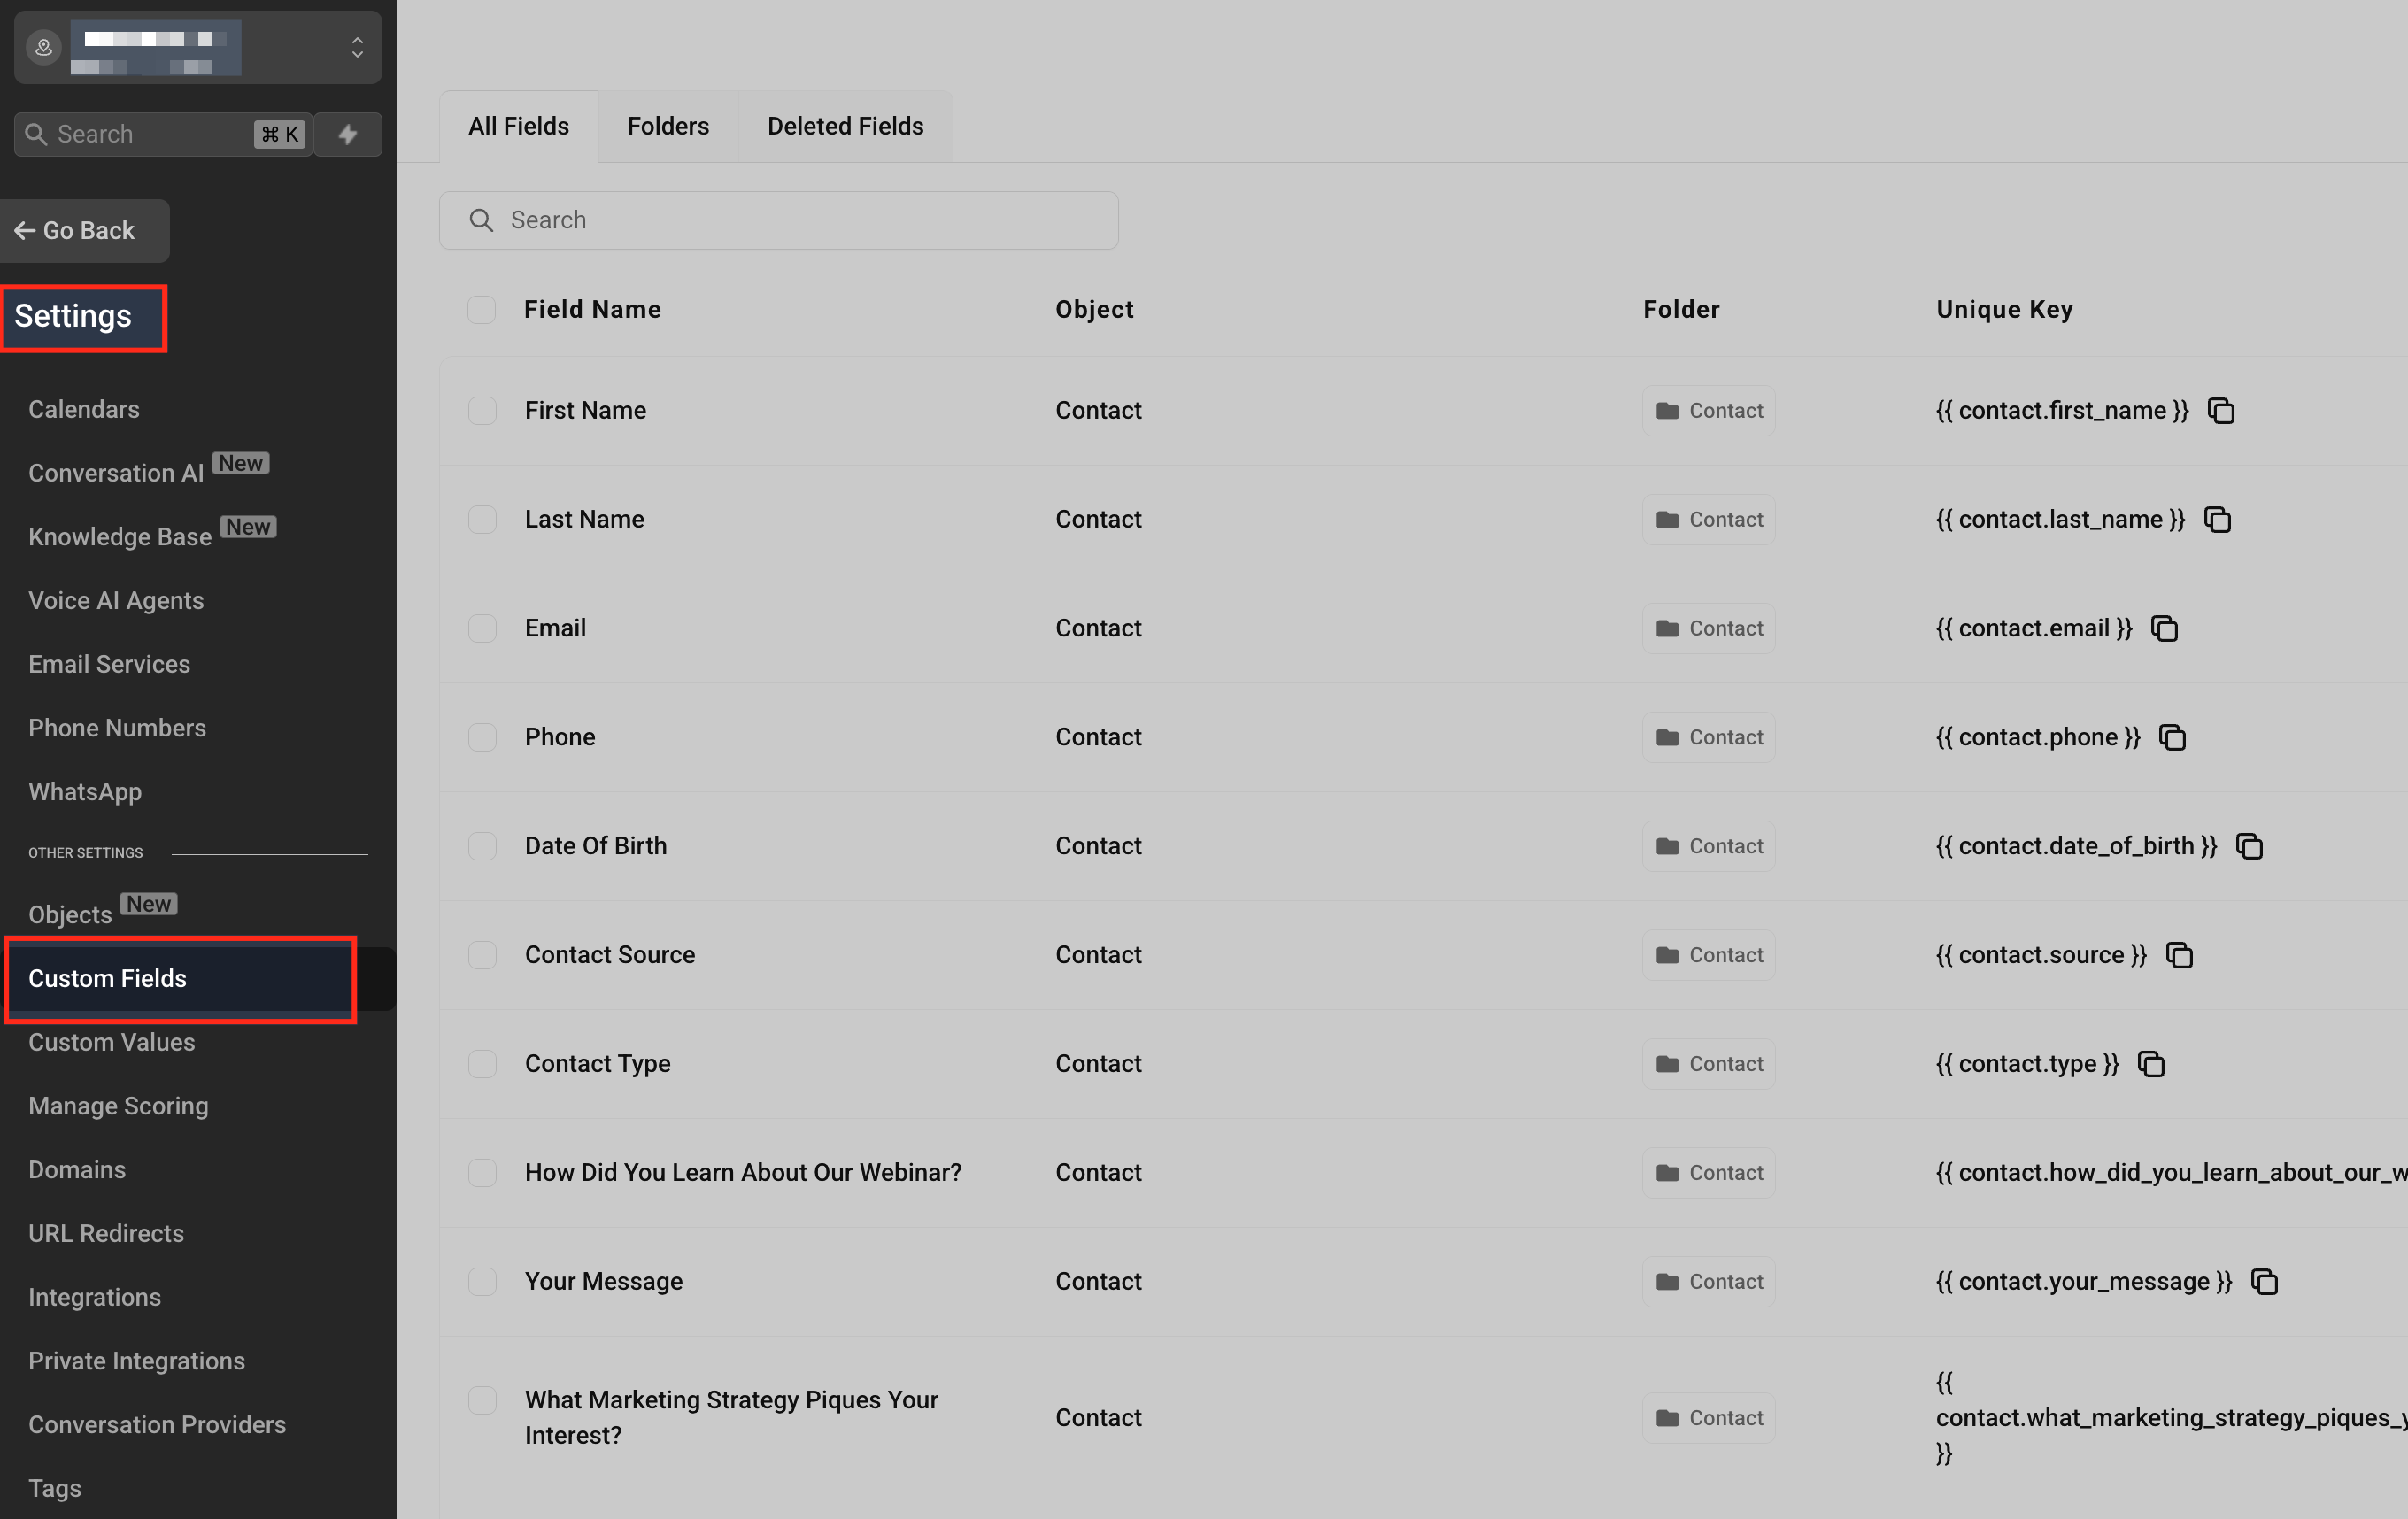
In your sub-account, click on Settings from the left menu, then scroll down and click Custom Fields. This is where you can view existing fields and create new ones for Contacts or Opportunities.
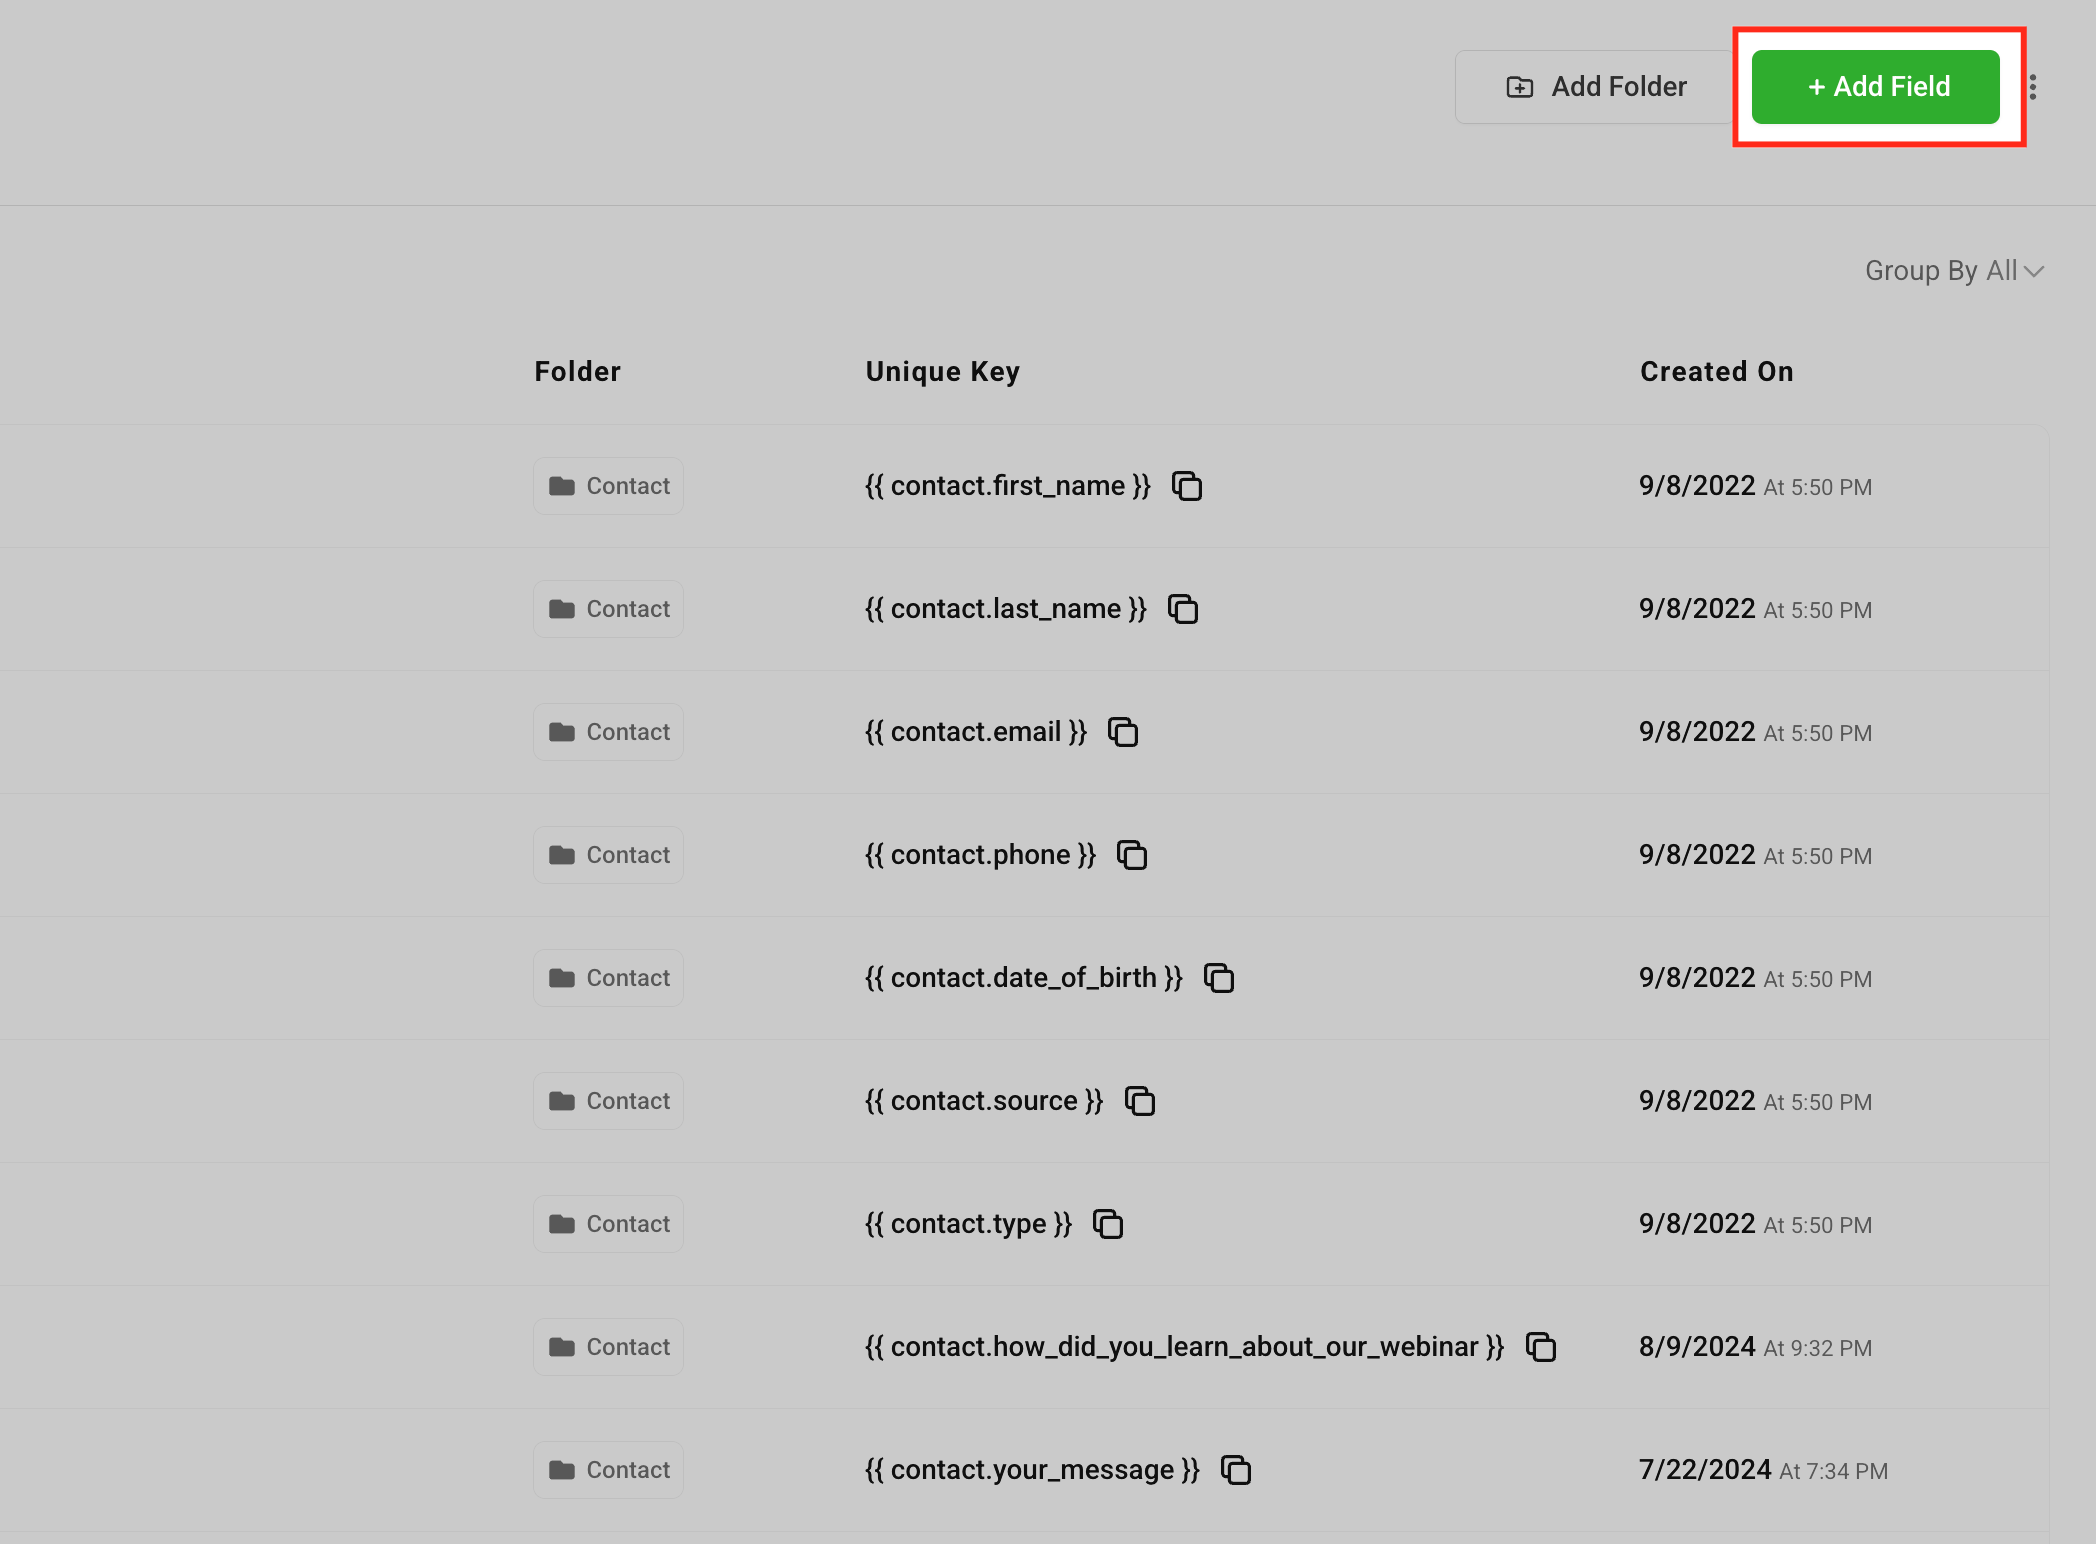
Click on “Add Field”
On the top-right of the Custom Fields screen, click the Add Field button to start creating a new custom field.
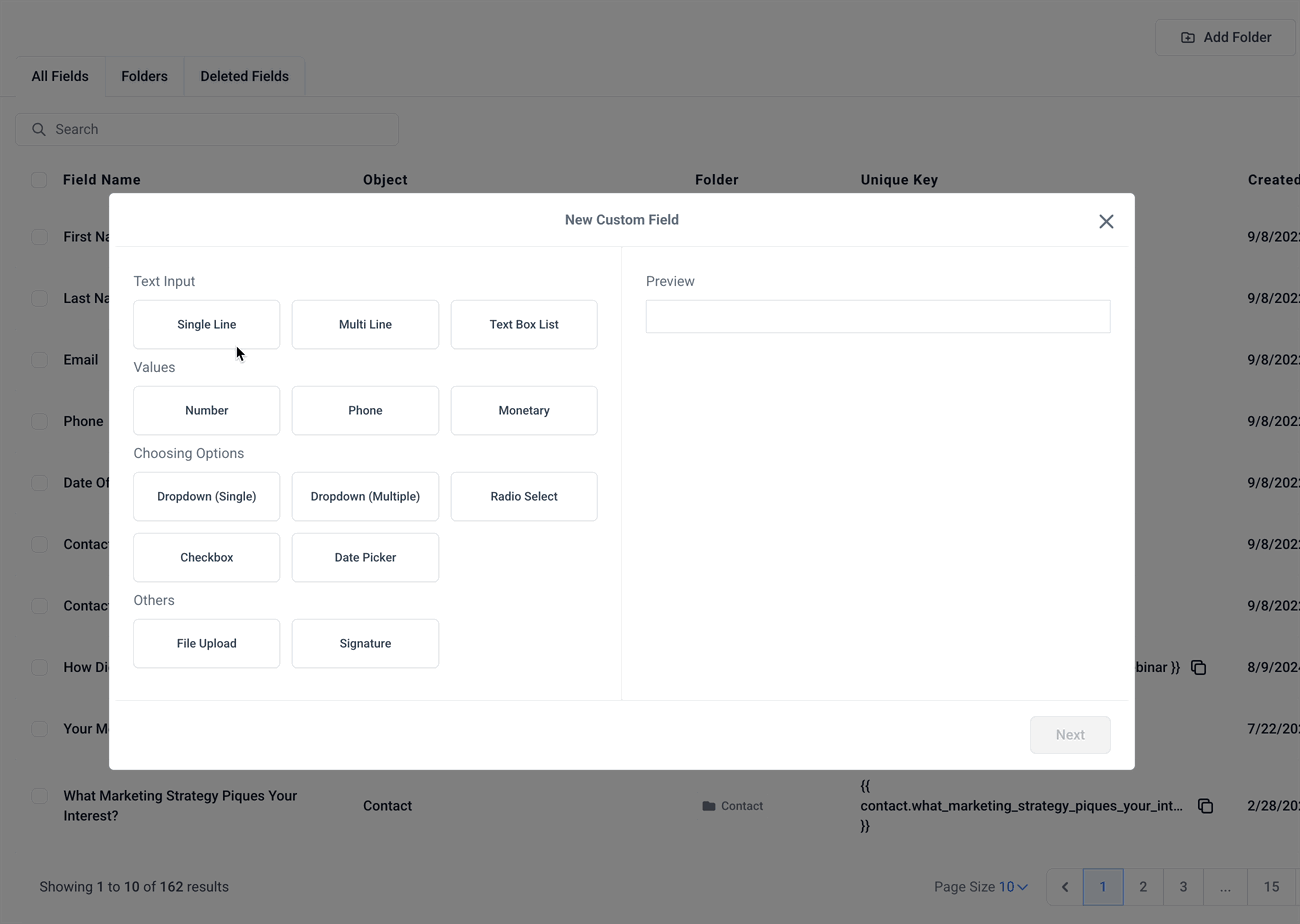
Select the field type you want to create—such as Text, Dropdown, Radio, Date, etc. Then under the Object dropdown, Choose Contact if the field should appear in contact profiles. Choose Opportunity if the field should appear in opportunities only.
Fill in Custom Field Details
Enter the Field Name, select a Group (or create a new one), and add Option Names and Values if applicable (e.g., for dropdowns or radios).
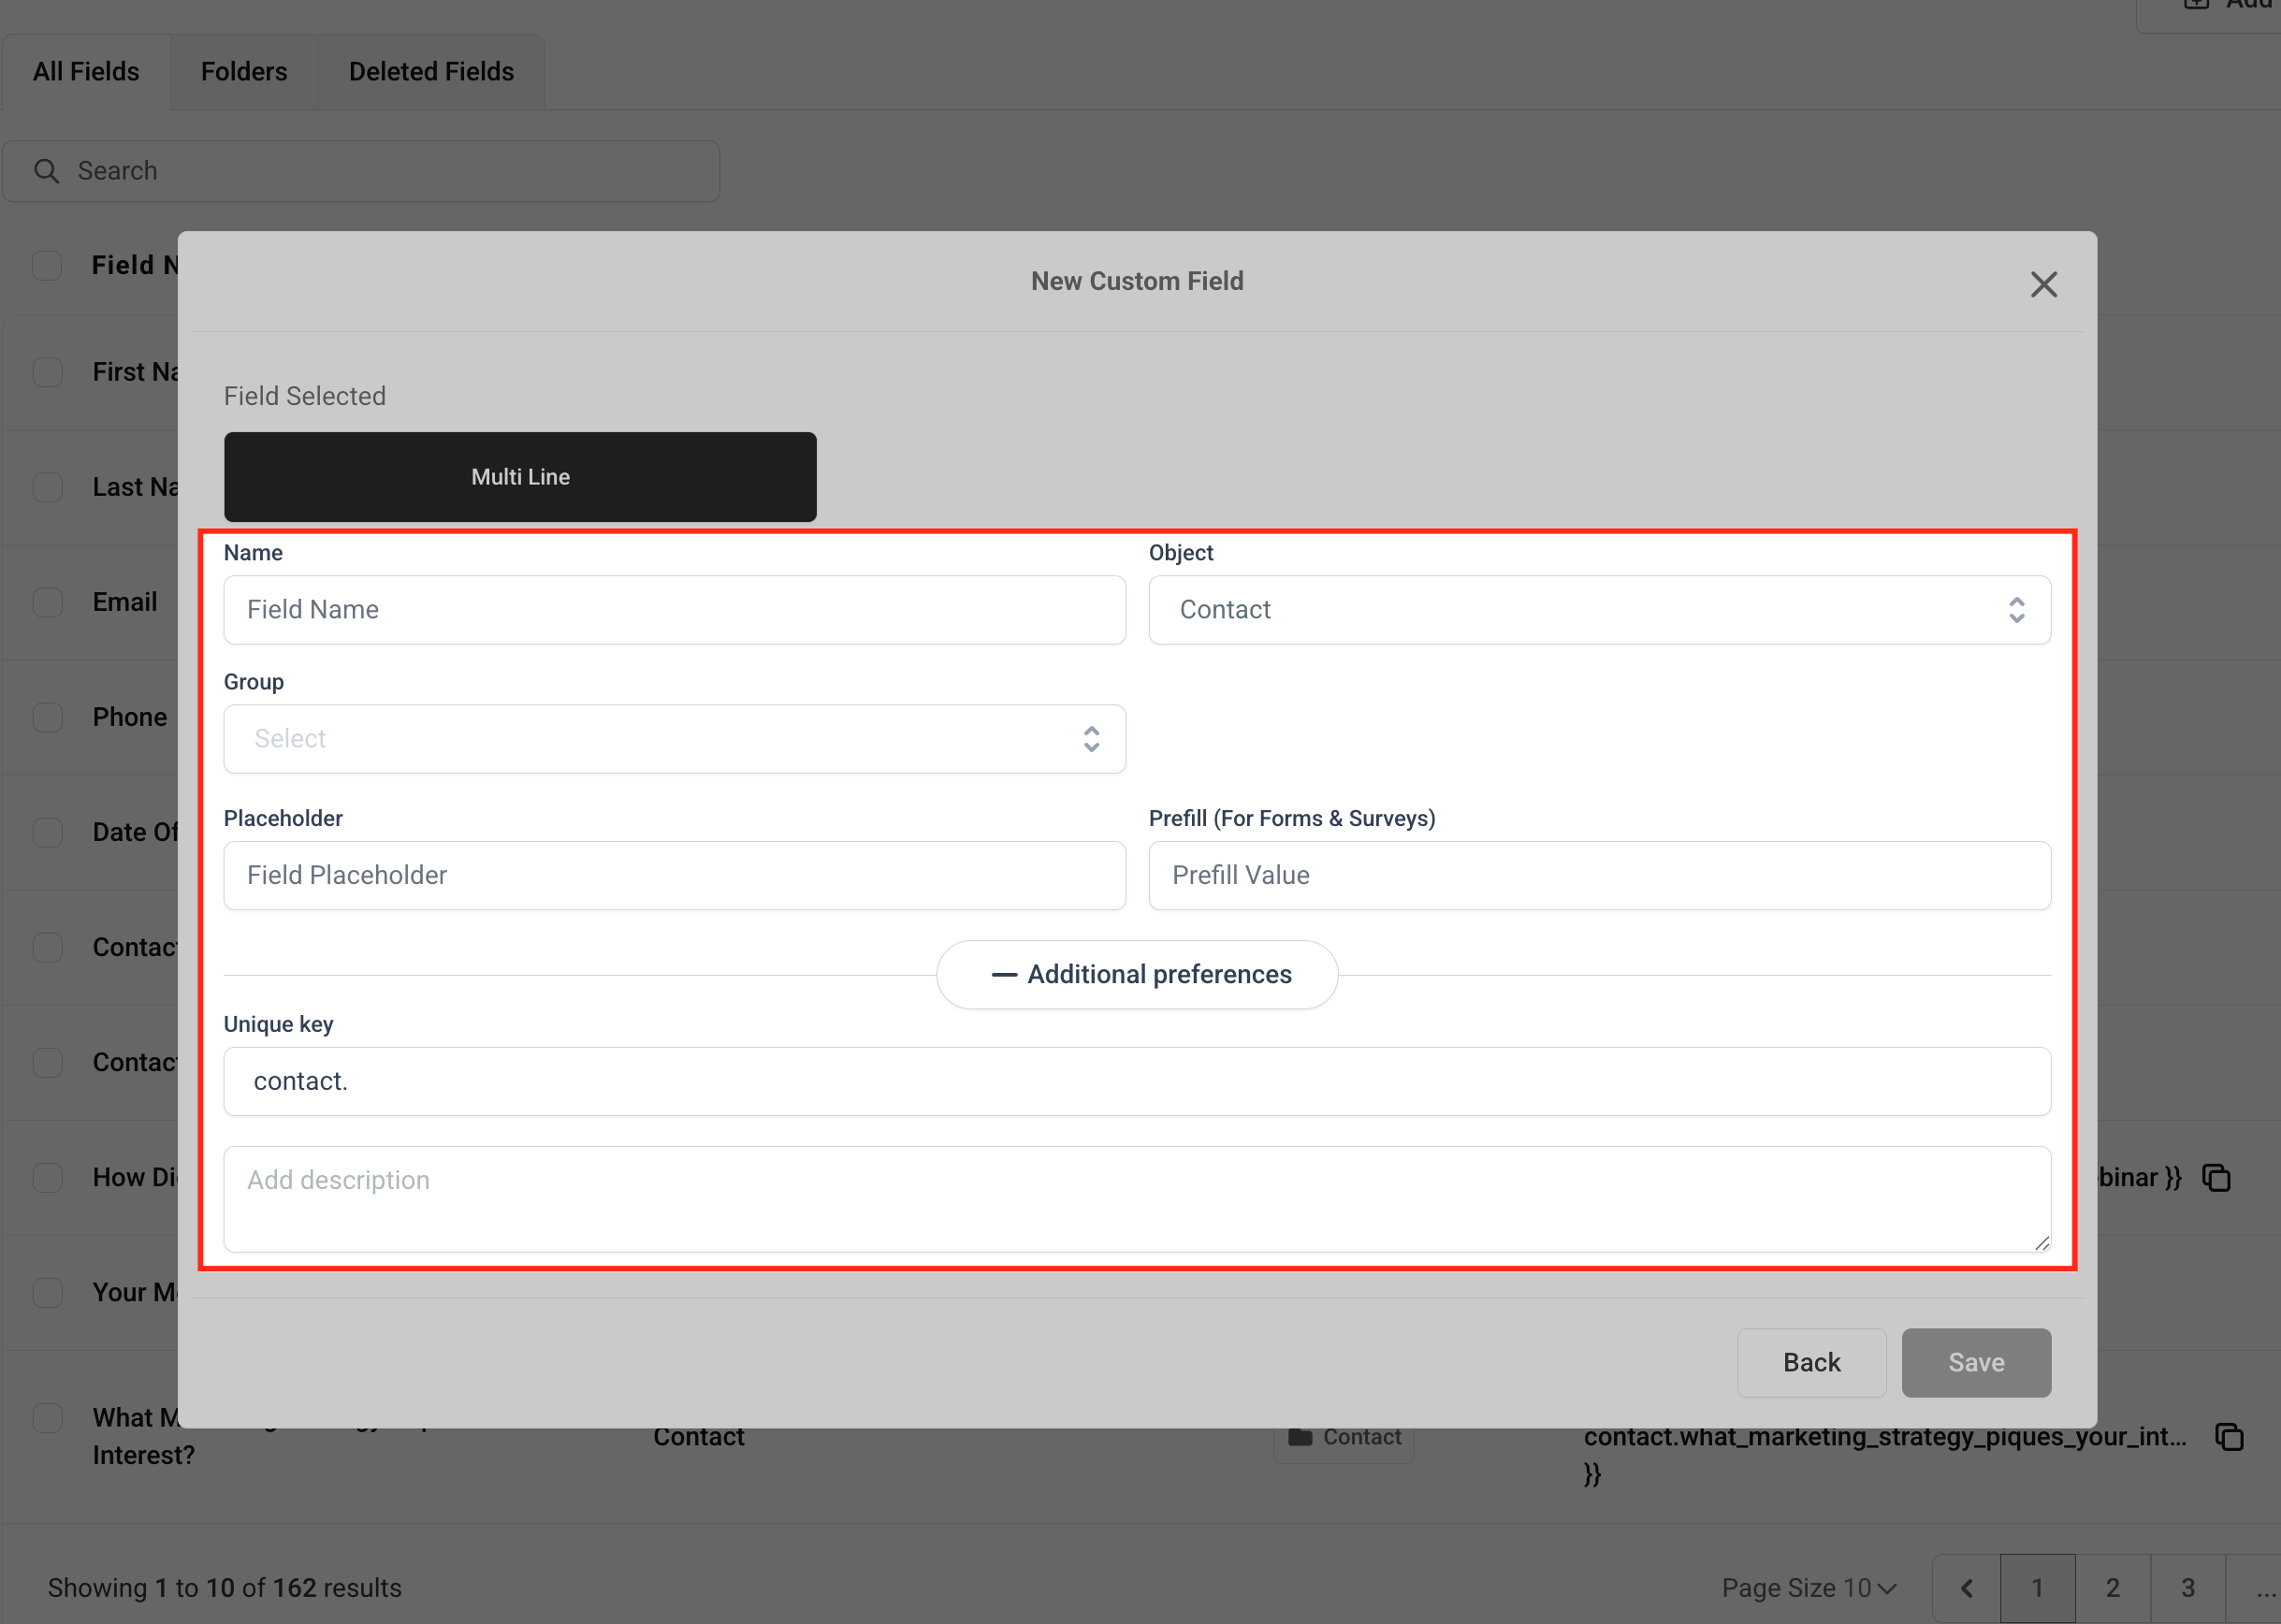
Save and Verify Placement
Click Save to create the custom field.
For Contact Custom Fields, go to a contact record to see the new field. For Opportunity Custom Fields, go to an opportunity card to see the field under “Opportunity Details.”
