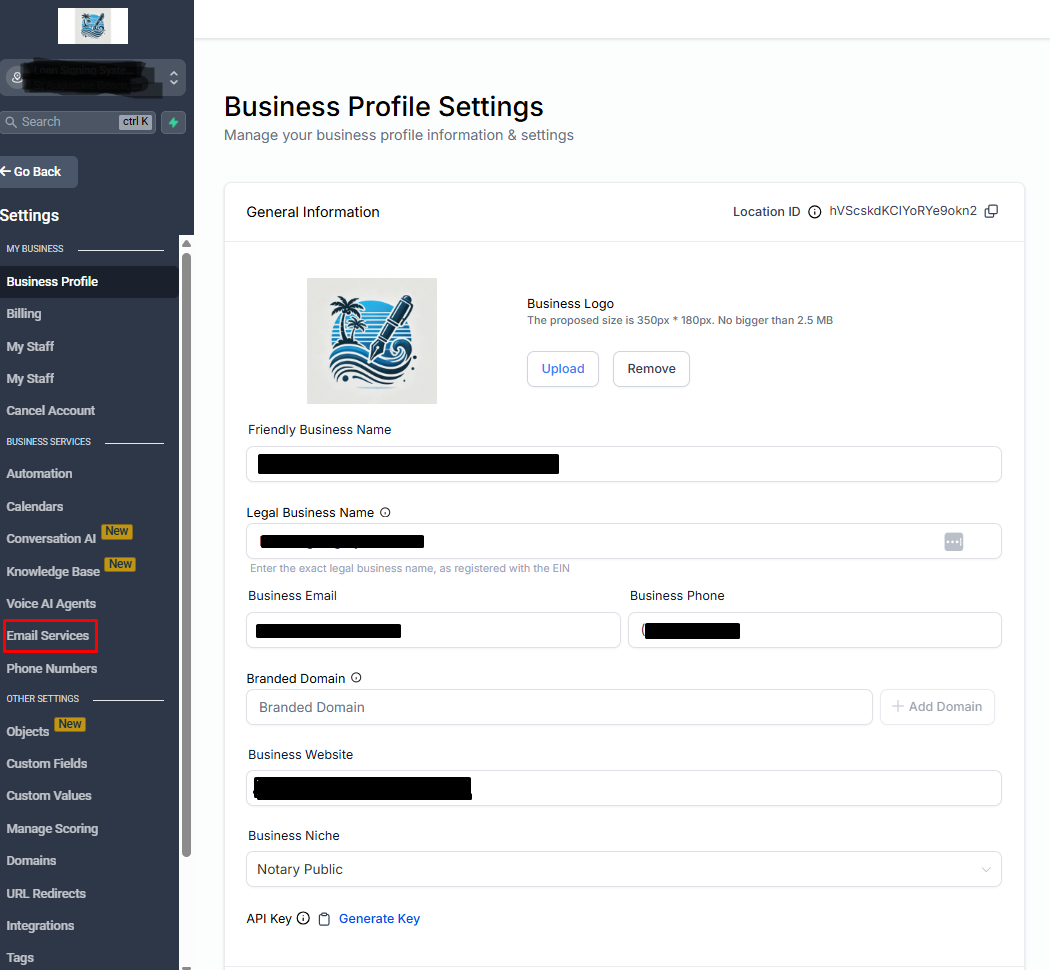
From the main dashboard, click on the Settings gear icon (usually found in the lower-left corner).
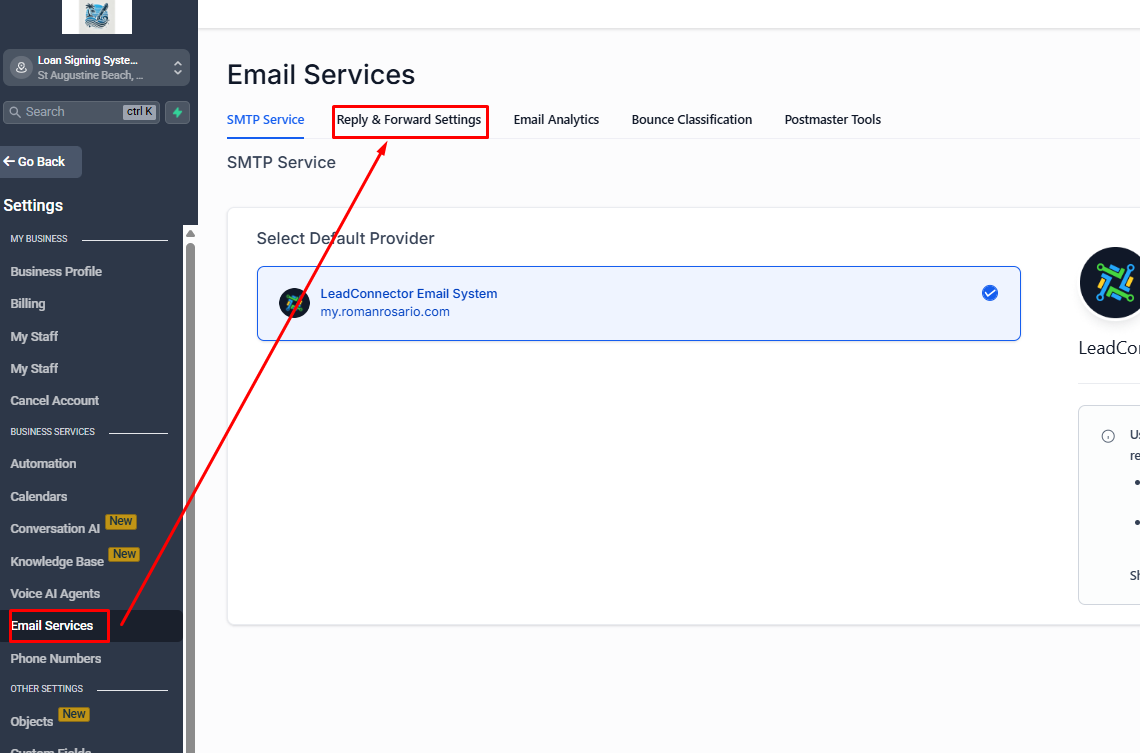
In the settings, under Business Services select Email Services.
Under Email Settings, locate the "Reply & Forward Settings" tab or section.
Click to open the configuration panel.
In the Reply-To Address field, enter the email address where you want to receive replies (e.g., support@yourdomain.com).
Ensure this inbox is monitored by your team.
Click Save or Apply to confirm.
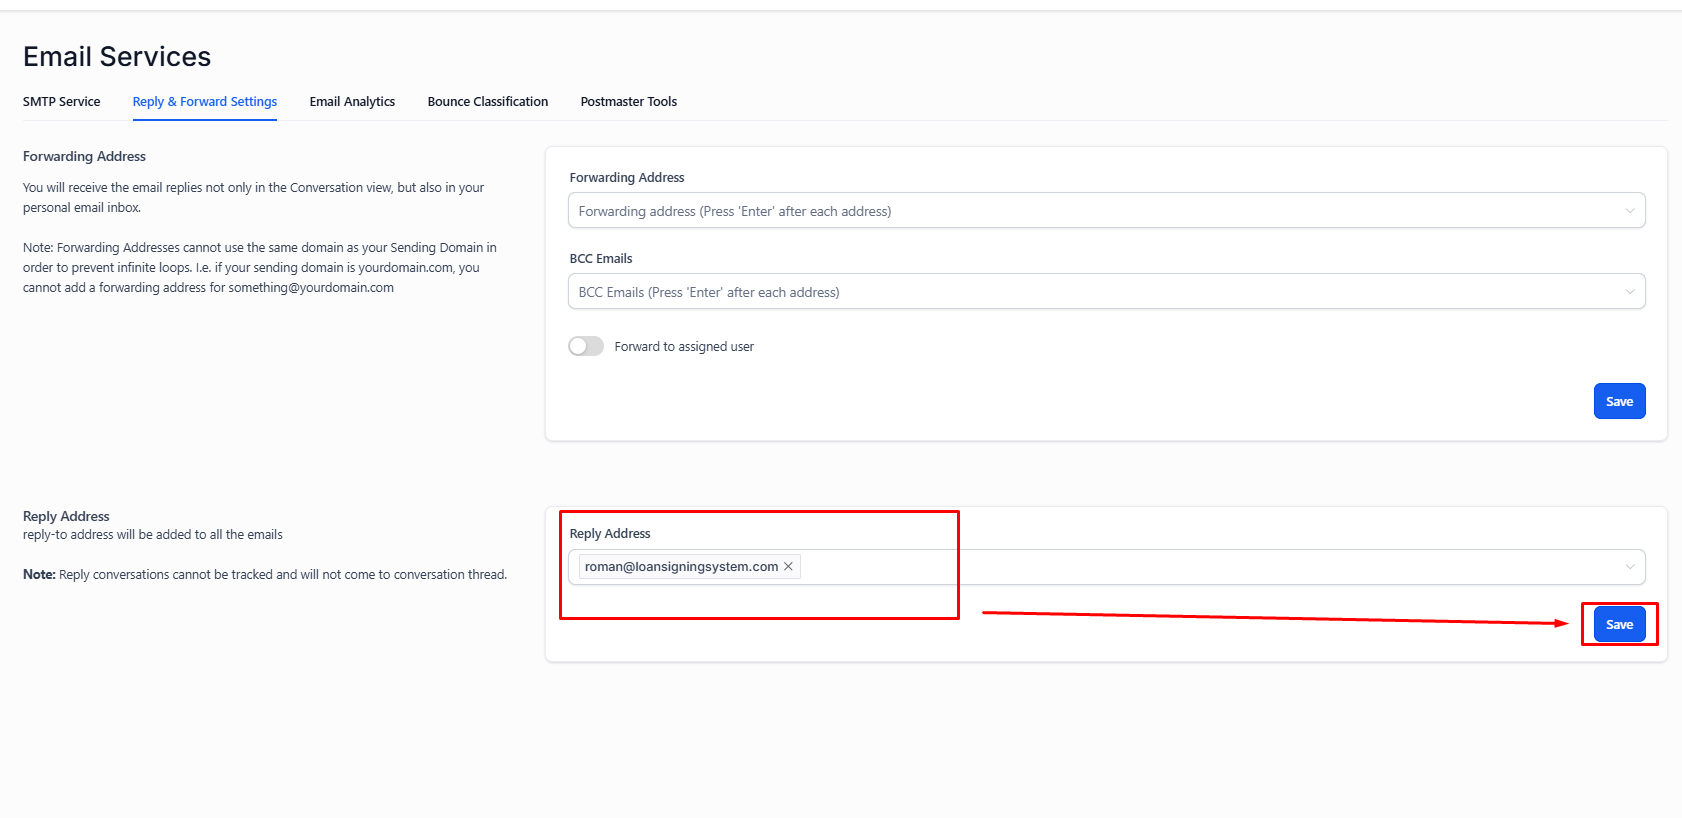
Note: If left blank, replies may default to the sender address used in the email campaign.
In the Forwarding Address field, enter the email address where copies of emails should be sent (e.g., manager@yourdomain.com).
This can be used for team visibility, compliance, or backup purposes.
Click Save or Apply.
Send a test email from LSS CRM.
Check that:
Replies are received at the Reply-To address.
Copies are forwarded to the designated Forwarding address.
Periodically review these settings to ensure they're still aligned with your communication workflows.
Update addresses if team members or processes change.
